


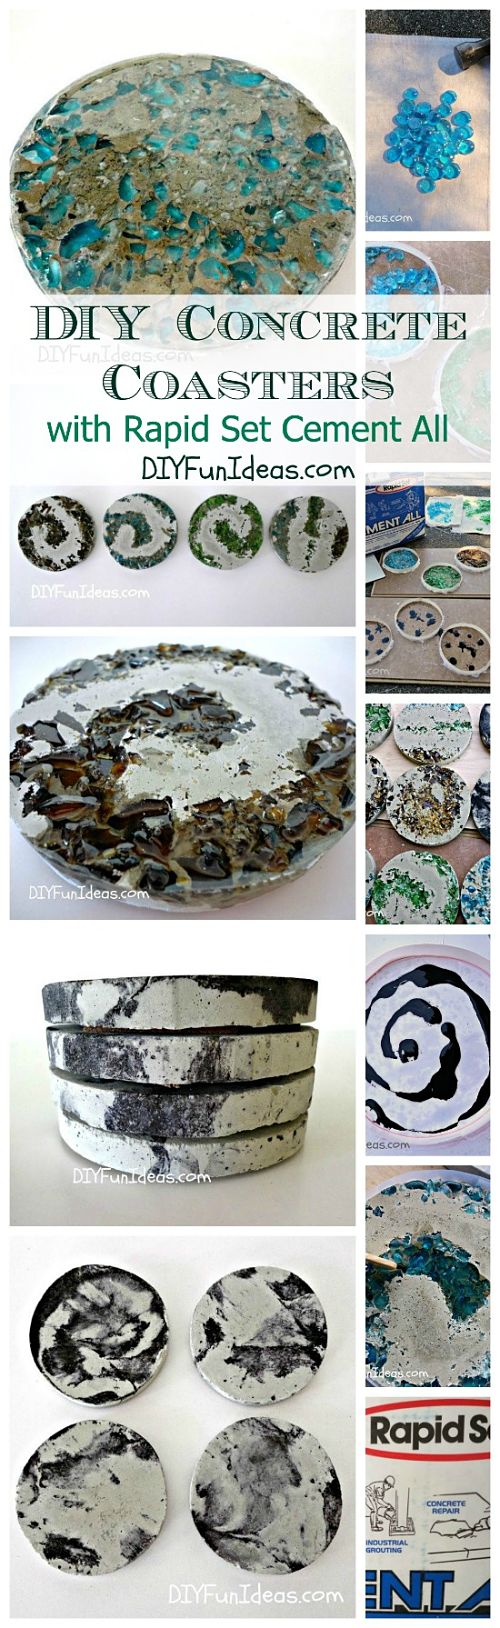
My concrete crush continues with crushed glass. Today’s concrete project involves not only a little crushed glass, but also some old fashion tie-dye, and of course, my favorite Rapid Set® Cement All®. We are making some really fun and different concrete coasters! So let’s get right to it…
Here’s what you’ll need:
– Rapid Set® Cement All®
– Poster board or heavy card stock
– Ruler
– X-ACTO Knife or Utility blade
– Stiff board or cardboard for the back of your cast
– Glue gun
– Glass marbles/bottles
– Heavy fabric
– Eye protection
– Hammer
– Liquid Dye (I used Rit)
– Eye dropper or small spoon to place your dye
– WD-40 as a release agent (cooking spray works fine too)
– Resin mix (recommended to cover any sharp glass shards on final product)
(above contains Affiliate links)
First thing you will need is something to use as a cast. To create my coaster casts, I simply used some extra poster board I had laying around from an old project, but any kind of heavy card stock will do.
– Slice up strips of your poster board. I recommend 1/2″ thick by 13″ long.
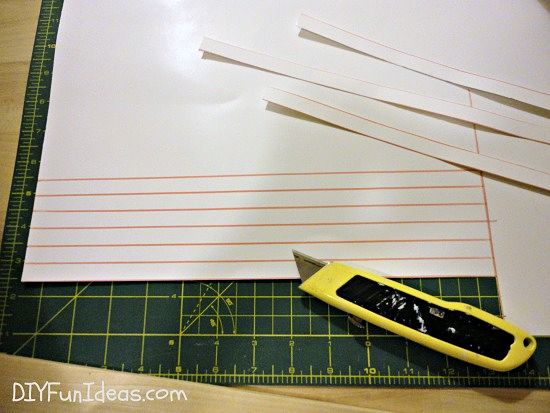
The easiest way to get perfect edges on your sliced poster board is by using either an x-acto knife or utility knife.
– Form your strips into circles and tape closed with approximately a 3/8″ overlap. This will give you 4″ round coasters.
These poster board circles will be the sides of your coaster cast.
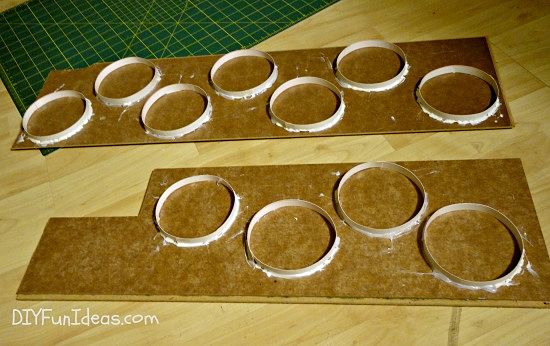
– Use a glue gun to attach your circles to a flat surface.
I used some old flooring strip boards that I had laying around, but you can also use heavy card board. I used heavy cardboard when I made my DIY concrete candle sticks.
I found that the easiest way to glue down the circles so that the shape doesn’t get warped is to first put down a glue bead on four “sides” of the circle. Let the glue take hold, then run the glue bead around the entire circumference. Also, gently press down the circle with one hand as you’re glueing to ensure that there are no gaps on the bottom for the concrete to leak out.
Once your cast is ready, prepare your glass. I found a good-sized pack of flat-sided glass marbles at Dollar General for….you guessed it…one dollar.
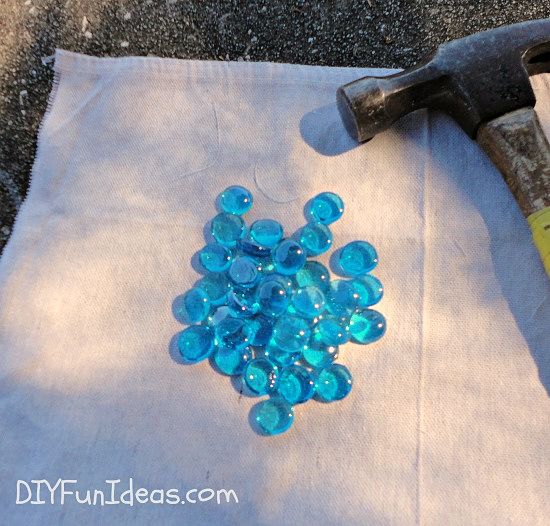
– To crush your glass marbles, wrap them in heavy material. I used some left over drop cloth that I had from my DIY Drop Cloth Covered Storage Boxes and DIY Drop Cloth Slip Cover Headboard.
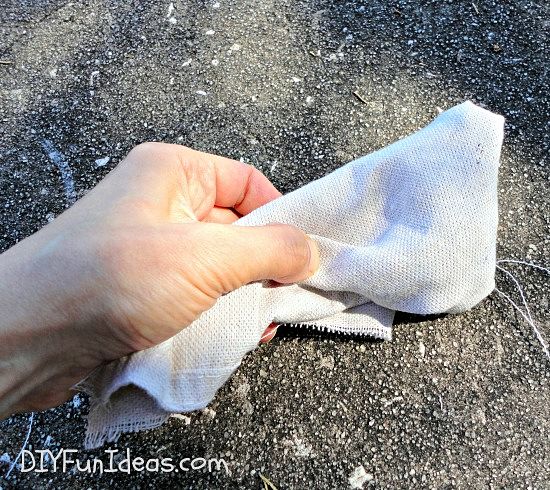
– Next, take a hammer and give it a few good wacks. Make sure to use eye protection because every now and then some pieces do get away.
I had originally tried to crush a bunch of the glass marbles at once, but for me, one at a time worked much better.
I also used some glass bottles that my little bro brought me from Oktoberfest. …He only brought me the empties. :-(
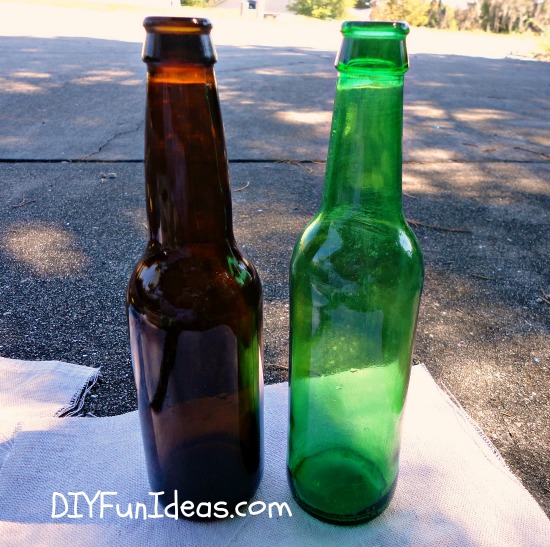
– Remove all labels from glass bottles. Check out The Easiest Way To Remove Labels HERE.
– Wrap label-removed glass bottles in heavy fabric and hammer away.
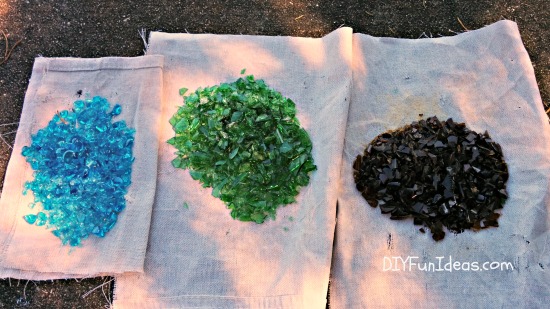
And, wa-la! Beautifully crushed glass…
– Spray some WD-40 into your casts for easy release. Then fill in your glass in what ever pattern you choose.
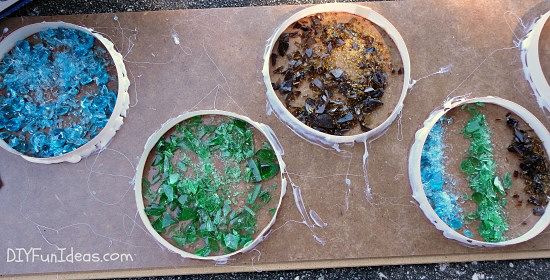
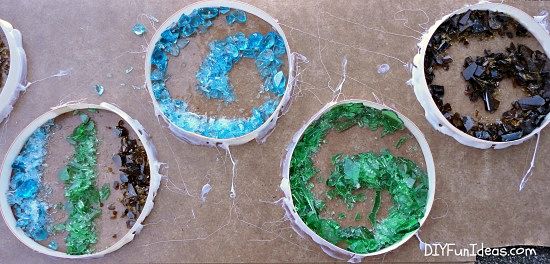
Some people recommend using adhesive spray to set an inlay. I chose not to do this since I was okay with some movement in the glass. Plus, adhesive spray seems a little contraindicative of the WD-40.
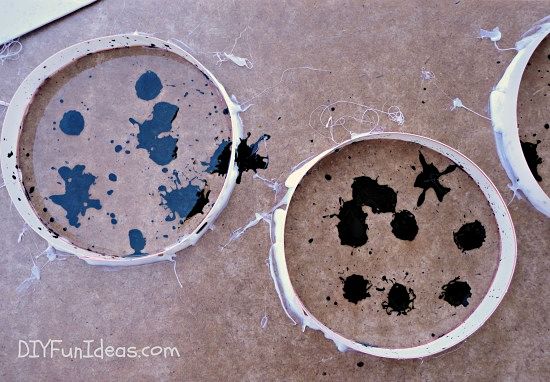
Aside from the glass, I had another idea I was dying to try. And that was to create a tie-dye look. (Really, no pun intended, sort of.) I already had some black liquid dye in the house, so I thought I’d give that a try before spending more on fun colors.
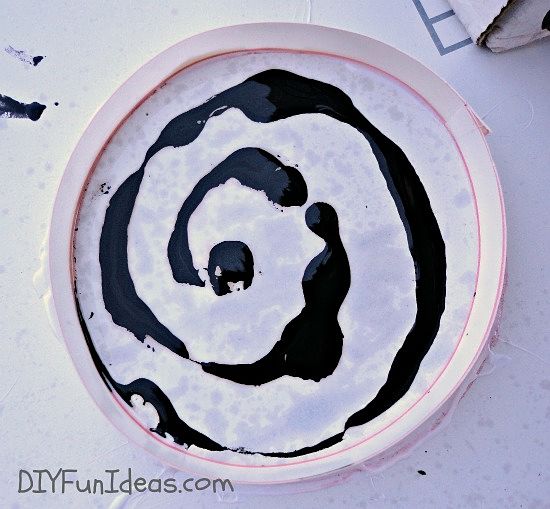
– Use a dropper to create desired patterns in your casts.
Here’s the whole shebang all ready to add my Rapid Set® Cement All®…
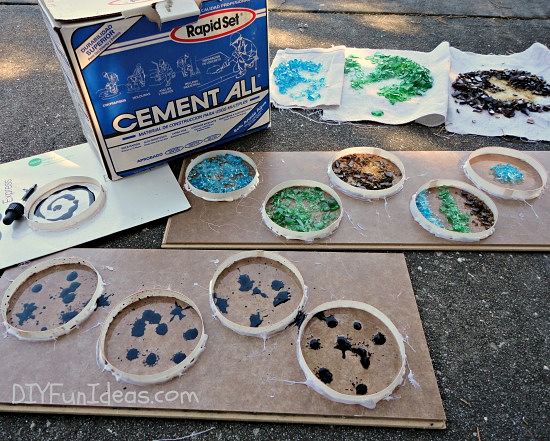
When it comes to my concrete projects, Rapid Set® is my fave! Why? Because it’s super easy to use. Just add water, mix, and pour. Plus, Cement All® is crack resistant and it won’t shrink when it dries, like other cement products do. Cement All® is rock solid in one hour, so my impatient self doesn’t have to wait the 24 hours that other cement/concrete products take to cure. It’s also more environmentally friendly than conventional portland cement concrete with a 65% lower carbon footprint. And it’s 3x stronger too. So I always use Cement All® for my decorative concrete projects and casting, but its also great for concrete repairs, home improvement projects, and remodels. Can’t beat that! (BTW, you can find Cement All® at Home Depots across the US & Canada.)
You can learn more about Rapid Set® Cement All® HERE.
– Mix your Cement All® with 3 parts Cement All® and 1 part water.
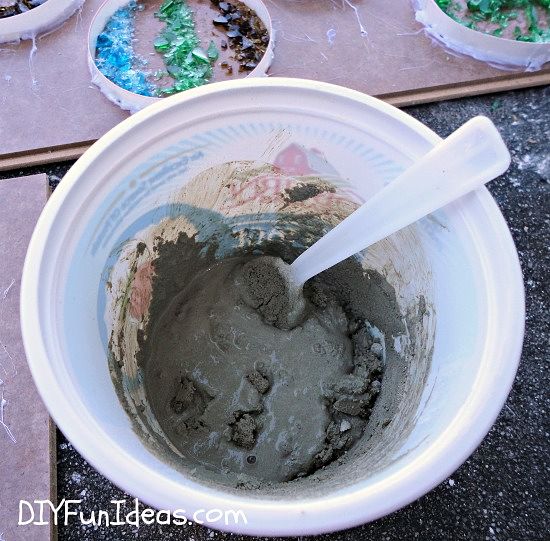
I added just a tiny bit more water so it was sort of a thick peanut butter consistency. The more water you add, though, the weaker the cement. So try not to be too flexible with the water.
– Fill your casts with the mixed Cement All®.
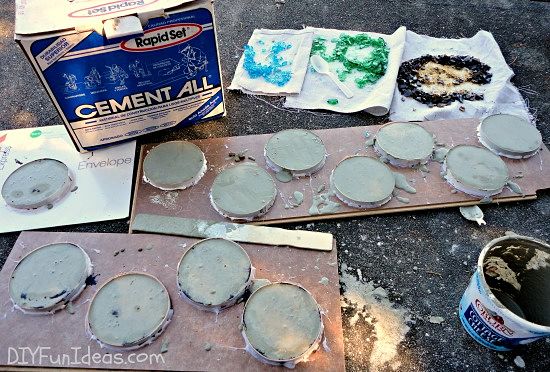
I tried to fill in the empty spaces around the glass first so that the glass didn’t move around too much.
– After filling your casts, give each a little spritz of water and then cover with some plastic wrap. Keeping the moisture in helps the curing process.
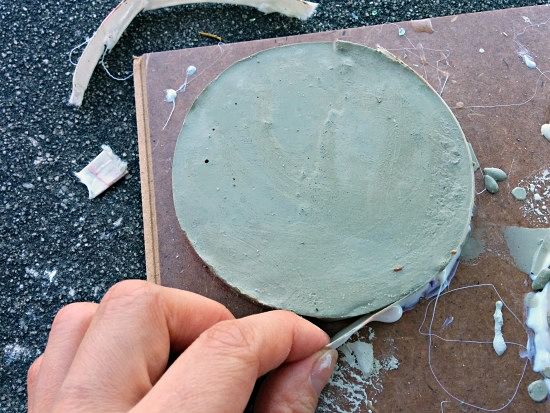
– You can start to unmold your cast after about one hour.
I LOVE that I don’t have to wait 24 hours to unmold. Yes, I’m that impatient.
– To unmold, simply peel away the side strips. The coasters will come right up.
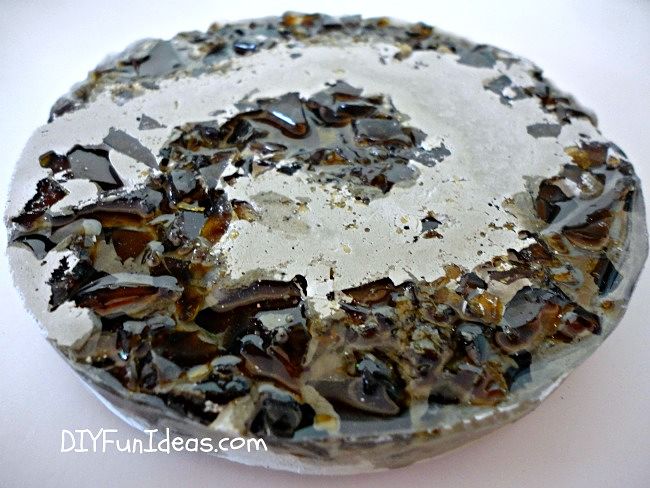
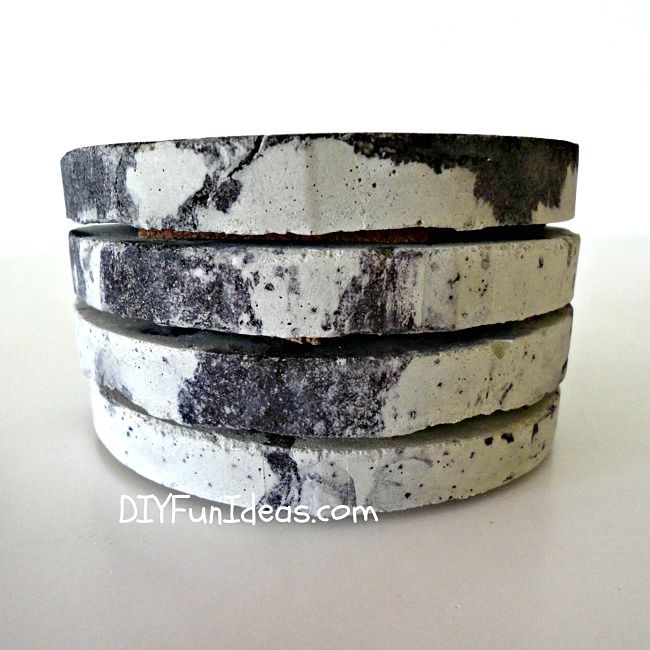
– Flip over your coasters and check out how gorgeous they are!
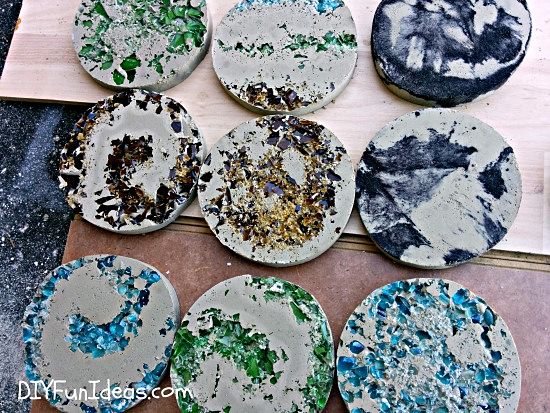
Since the glass was piled into my casts, only the glass adjacent to the cement adhered. This gave the coasters a really cool inset geode-like effect. And my tie-dye coasters came out pretty cool too!
The one thing I found with the crushed glass though was that some of the sharp edges were exposed which was a bit of an ouch hazard.
So I thought I’d try filling in the area around the glass with resin. I hadn’t used resin before so I was pretty excited to try it, and a little nervous — nervous because I didn’t want to screw up my pretty new coasters.
I found the resin at Hobby Lobby, but it’s also available at Michael’s. Both stores have a weekly 40% off coupon, so don’t forget to pull up the coupon on your mobile phone and show it at the register.
– Mix your resin. The resin comes in two parts that must be mixed together in equal amounts. The resin I used came with tiny measuring cups which were very helpful. I used a total of about 35mL of resin.
There are two things you want to do when mixing your resin: 1) measure as precisely as possible, and 2) mix until there are no swirls visible. Both of these will ensure your resin dries well and is not left tacky.
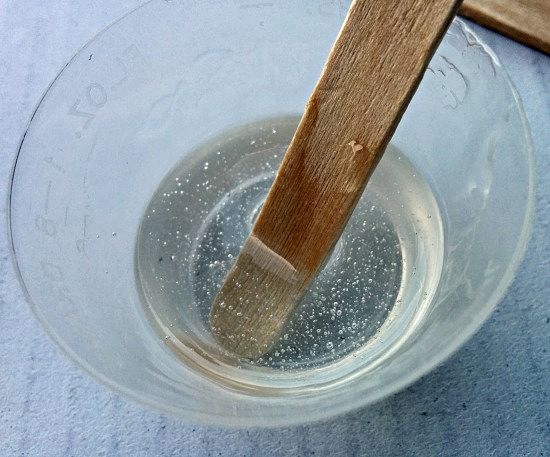
The resin will be full of air bubbles after mixing. If you let it sit for a few minutes, a lot of the bubbles will start to rise to the top. You can then scoop them to the side and crush the bubbles.
– Before adding resin to your coasters, wrap tape around the entire edge of each coaster. This will prevent resin from running down the sides.

– Fill the glassed area of your coasters with the resin. You can pour the resin on, but for more precise placement, I chose to drip the resin from my mixing stick onto the glassed areas.
– Use your mixing stick to spread the resin as necessary.
– If there are still visible air bubbles in your resin, running a lighter over the resin (or another gentle heat source) will help bring the bubbles to the top and release.
– Let the resin dry for about 6 hours. (I simply left mine to dry over night.)
– Glue some cork strips or felt to the back of your coasters.
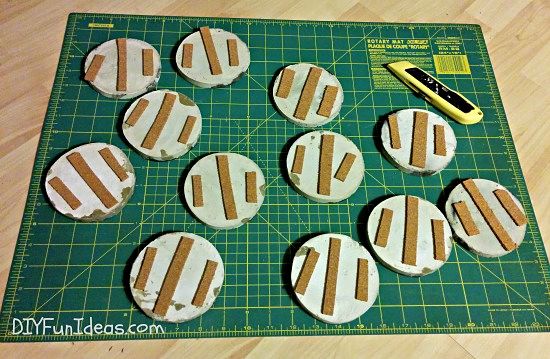
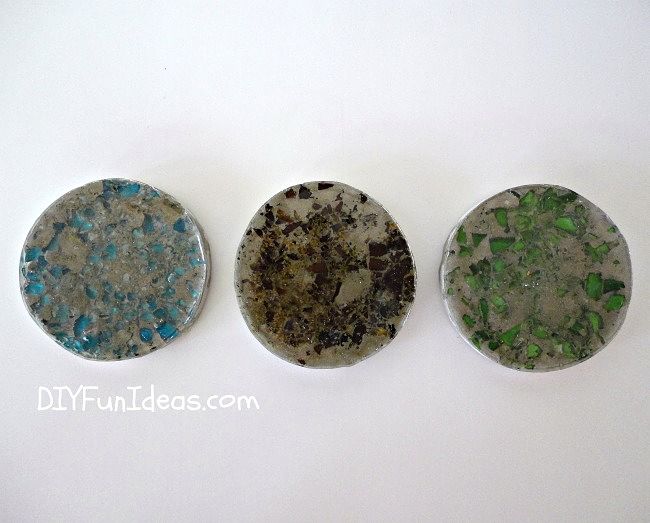
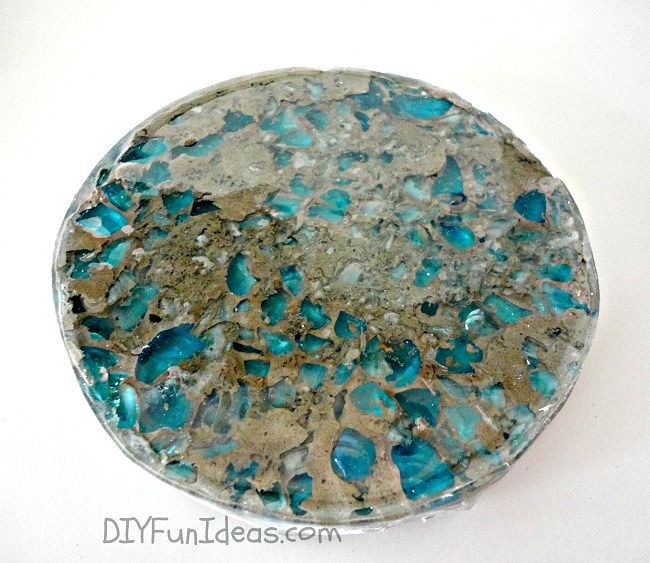
Then turn your gorgeous concrete coasters over and check out how beautiful they are!
Seriously gorgeous, right!
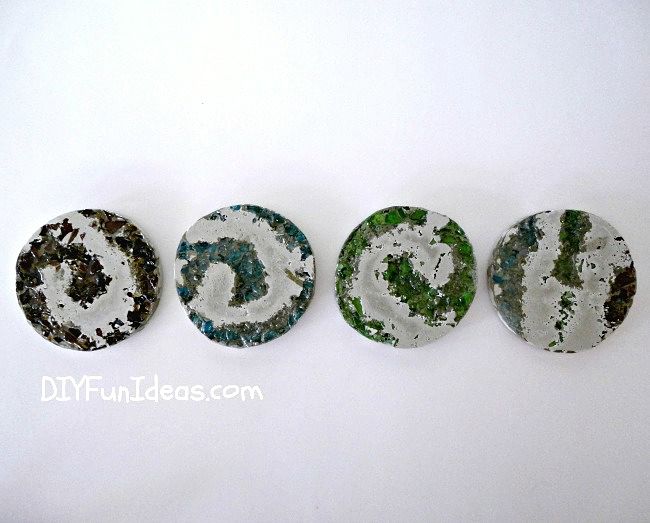
Here are my tie-dyed concrete coasters…
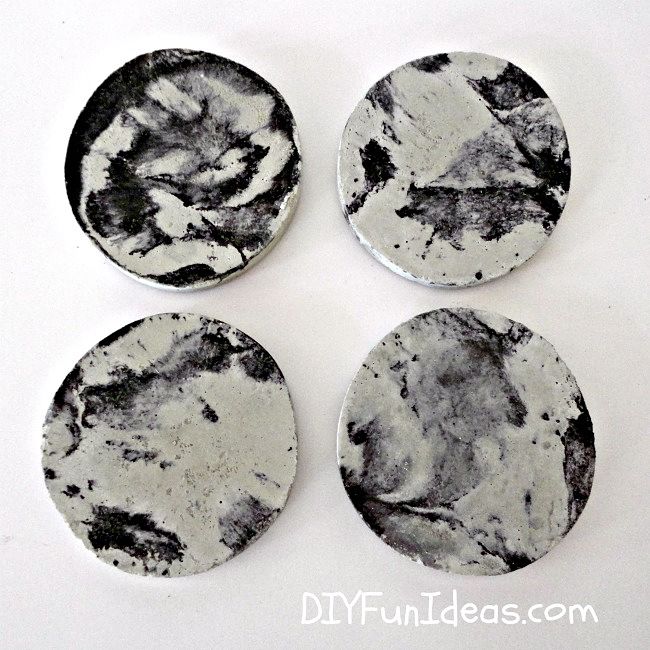
Totally LOVE!
I seriously can’t decide which ones I like better, the glass concrete coasters or the tie-dye concrete coasters. Both are very different, but I’m in love with all of them!
I’d like to thank Rapid Set® Cement All® for sponsoring this post and helping bring this fun tutorial to you! Now go make some concrete coasters! Check out more DIY Rapid Set Cement All project on Pinterest HERE!
This post contains affiliate links.
Wow – all of your crushed glass looks so nice and neat. It’s interesting how your tie-dye coasters came out to have a bit of a marble effect to me.
Thank you Yona! I’m pretty happy with how they turned out. I think I’m gonna make a bunch for Xmas stocking stuffers too.
Omg these coasters are wayyy toooooo coolllll!!!! So chic!!!
Awe, thank you Courtney! :-)
What a cool project! Those turned out great! I love the glass ones!
Thank you Kendall. That’s really nice of you to say.
Those are some nice looking coasters. I am not that crafty but it looks pretty easy to do.
Thank you Michele. Yep, definitely pretty easy to do. :-)
Wow these are beautiful! I’m not sure I could make them myself, but thank you for the awesome instructions!
Thank you Michelle. Definitely not hard to make and would make fun stocking stuffers for the holidays!
Suggestion: cross cut the cork for symmetric little disks and pace only three on back for level balance
This is a really awesome and creative idea! Great way to recycle too!!!!
Thank you so much Amby. And a really fun project too!
There’s no waste when you recycle and follow these DIY tips. Thanks, like them btw.
Thanks Elizabeth. Yes, always good to recycle any way I can. :-)
These coasters look absolutely amazing, they seem simple to make also.
Thank you! The prep takes a little time, but definitely not hard to make.
this is so cool thanks for sharing
You are so welcome Rubbie Anne!
We used the same kind of cement to make a stone for my mother in law’s garden path and we put our kids hand prints on the cement stone along with their ages and decorated the stone with jewels like above. My mother in law loves it!
Heather, That sounds awesome! Yes, you can definitely make really awesome stepping stones with Rapid Set, but what I really love is that you put your kids hand prints in it! Now that’s something to treasure forever!
wow that is so neat! I learned to do something useful in less than 5 minutes.
Thank you so much! I always love learning new stuff too!
Boy, you sure know your way around concrete! I don’t think I have the skill to pull this off!
Thank you so much. But I bet you could pull it off! :-)
Creativity and following instructions have never been my strongest suit but i love how you have explained each step. I have never even thought about using crushed glass like this apart from throwing away lol. This is beautiful master piece
Thank you Myrabev for your very generous comment!
Oh wow, this is really cool! I never thought of using rapid cement like that. And it looks like you’d have a lot leftover, so you could do even more fun projects with it!
Cheers!
JoAnna
foreverinparadise.net
JoAnna, The Rapid Set definitely has gone a long way for me. I’ve made a bunch of projects from just one box. Here are some more projects made with Rapid Set Cement All that you might enjoy:
Modern Industrial Concrete & PVC Bar Stools
DIY Concrete Planter Hands For Succulents
Uber Modern DIY Concrete Clock
DIY Tall Concrete Candle Sticks For Tea Lights
Halloween Craft: Creepy Concrete Tombstone
LOVE these! These turned out wonderful! They would make an awesome gift!
Thank you! Actually, I’m planning on making a few more sets for stocking stuffers for the holidays.
What a brilliant idea. Good job! I’m not sure if I can do this though. I don’t consider myself a DIY-er. :)
Thanks Lynndee. It is actually really easy to make, just takes a little time.
wow this really looked so much – it seemed like hard work but it is really wonderful.
Thank you Aisha! It’s actually really easy to make. Just takes a little time. :-)
This is a really neat idea and I love how it looks with the resin on it – especially that blue one. Will be featuring you next week. Thanks for linking to the Craftastic Monday party at Sew Can Do!
Oh my goodness Cheryl, thank you so much! Now, I can’t wait till next week! And thank you for hosting each and every week!
Wow, those are simply gorgeous! I have some coasters made from agate stones, but I wouldn’t mind having something like this.
Thanks HilLesha! They’re really easy & fun to make.
I’ve been on the hunt for glass projects that my boys can do (with my supervision of course)…and this will make great projects for gifting too! Thanks so much :D
Thank you, Tanya! And yes, please be careful with the glass. Definitely eye protection and I highly recommend gloves if possible to protect from little shavings of glass.
What a cool project, you gotta love those coasters! I’m not very crafty so I’m amazed of what you created, Jenise!
Thank you very much Delia! You are too kind. :-)
These look amazing Jenise!
Thanks Mary! xoxo!!
Interesting craft tutorial. I wonder if instead of cement, I could make it clear. I’d most likely end up putting some felt n the bottom of these, but I’ve been toying with the idea of making my own coasters.
Brilliant minds absolutely think alike, Nile. Lol. I was thinking about trying to make these with just the resin and glass. I’m not sure about using paper as a cast for the resin, though, so I’ve decided I’m going to try my hand at making a silicone mold for it (which I should also be able to use with concrete too). So check back cause that tutorial will likely be coming up in the next few weeks!
oh wow it’s so brilliant! The concrete look pretty I especially love the crushed glass ones :)
Thank you so much Misa! I love them too!
Wow these coasters look amazing! Thanks for sharing!!
Thank you so much Adelina for your kind comments!
I am so impressed! What a cool craft.
These are really cool! I can totally see myself just making a complete mess with these but it’s almost worth a try because they are so neat!
Haha, who said I didn’t make a mess? Lol. But it’s definitely worth a try Risa!
I like the tie dyed coasters because they look like marble. I’d always worry with the glass ones that my drinks wouldn’t sit right and slide off because of the glass pieces!
Thank you so much! I’m really like them too. Most people seem to like the glass ones better, but I think I’m leaning more toward the tie-dyed too. :-)
Well done. I am impressed how you did that. Thanks for sharing it.
Awe, shucks. Thank you so much Juliana! :-)
These are really cool! I never would have thought to use cement for a coaster!
Thank you so much Melanie! There are sooo many things you can make with cement/concrete. And I love that industrial vibe you get with that material.
Wow! They came out so beautiful, I love them and will have to try this!
Thanks so much Chrissy. If you try it, definitely send over a picture!
These are really cool! Thanks for sharing them with SYC.
hugs,
Jann
Thank you so much Jann! And thank you for hosting each week!
These are gorgeous! These are going to make perfect Christmas presents! Thank you so much for sharing at Party in Your PJ’s Link Up!
Thank you so much Kristen! And thank you for hosting a fun party!
You made it look so wasy. I´d been afraid of tryiong out something like that. I thought i¨d make a mess of it.
Thanks Paula! You know, sometimes its fun to make a mess. :-)
This one is so cool! You’re such a creative individual. It looks like it’s hard to do
Thank you so much Kath! Oh and it’s not hard to do at all. Seriously, the hardest part was gluing down my little poster board strips…which actually wasn’t hard at all.
What a great tutorial! I have always been too afraid to work with concrete, but you made it look so easy. Thanks for sharing, visiting from Artsy Fartsy Mama.
Thank you Aimee. I’m glad I could show you how easy it is. Seriously, it’s add water, mix, pour, done. I think the word “concrete” is scary to a lot of people because it makes them think of heavy construction. But if you can mix up pancake batter, then you can mix up concrete/cement.
What a cool idea! I hope you will link it up at the Found & Foraged Linky Party tonight! Hope to see you there http://www.thebigrevealblog.com
Thank you Grace! And thanks for the invite. I’ll make sure to stop by!
Thank you ,
I make pet grave stones and memorials.
With the glass they look terrific
Gorgeous! Do you have any issues with sticking to the glass or mug? I did with my modge podge coasters, wonder if the resin is the way to go! :) Popped over from the Your Designs This Time party! :)
Hi Megan! Thanks for stopping by! So far I haven’t had any trouble, but I’m primarily a tea drinker so I haven’t yet used them with cold drinks that sweat on the outside of the glass. But my mugs haven’t stuck at all.
Oh, and do you have a link to your mode lodge coasters? I’d love to see them!
These are so cool!! I especially love the black & white ones- awesome! Thanks so much for linking up to Found & Foraged. Hope to see you again Saturday. xo, Laura
Thank you so much Laura. I’ll be sure to stop by again!
This is just a cool project! Thank you so much for linking up at Found & Foraged! PINNED! Hope to see you again this Saturday night at 8PM at http://houseofhipsters.com
Thank you Kyla! Looking forward to the next Saturday!
The resin can also be purchased at home depot, so you can pick it up with your cement. Neat ideas.
Thanks Zac! Yes, you can definitely pick it up at Home Depot. But what I do love about Hobby Lobby is that they always have a 40% off coupon online. So if I’m buying a single item, I just whip out my phone, pull up the coupon, and I get the discount. Plus, for me, Home Depot is right across the street from Hobby Lobby so it’s easy for me to get it done in one trip. :-)
I have just discovered the love for Rapid All! And those tye die are fabulous :) Do you think acrylic paint the same? I have some left over glass too. Thanks for the ideas.
Hi Lisa-Lin, You can definitely paint the concrete with acrylic paint.
Hi Jenise,
I would like to know how i can make outdoor kitchen concrete countertop with peeble glass and finishing with resin? Can you help me?
Hi Renee, My apologies for the delayed response. I have a concrete countertop tutorial here: http://diyfunideas.com/make-concrete-counters-like-pros-tutorial-ashby-system-part-1-intro-templating/
You can follow a lot of those steps, but if you want glass in the counter that shows through you will have to add the crushed glass to the concrete mix and then wet polish the dried concrete with a tool like this: http://amzn.to/1VIH0W0. After that you really won’t need to finish it with resin, you can simply seal the concrete the way I do in the tutorial. But if you still want a resin finish then you can find info on how to do that here: http://diyfunideas.com/diy-penny-tiled-table-or-desk/
Hope that helps!
Gorgeously clever!
I want that look, crushed glass, with or without concrete, (haven’t decided) on my wall.
Applied straight on to plaster, how would I do that?
Thank you Gina. That sounds like it would be beautiful! I’ve never worked with plaster, though, so I’m not sure how well it’ll hold the glass. I’d recommend doing a test sample on a small board of wood to see if the plaster holds the glass. I would love to hear how it turns out.
These are so cute! I’d like to try them. I’m just wondering if you think it’d be a good idea to seal them. I saw you comment on using them primarily for hot beverages, but in my house it’s a pretty even mix between hot and cold drinks. Any thoughts? Oh, and how are they holding up after all this time? I am excited about this project.
Thank you so much Beth. The coasters are holding up perfectly. They really don’t need to be sealed, but it also wouldn’t hurt them. Sealing will give the concrete a bit of a different look, making the color a little deeper and give it a bit of a sheen. I suppose it’s just a preference thing at this point.
Love the crushed glass ones. Is it possible to color the Rapid Set Cement? I want to make tan or cream color coasters with crushed glass.
Hi GM, You can color Rapid Set any color. Pigments come in both liquid and powder forms. Here’s a link to some different pigments: http://amzn.to/1XXWl4n
These are really cool and could be fun to make with kids (as long as they don’t handle the broken glass). The possibilities are endless and they would make really neat custom gifts!
I LOVE IT ! It looks amazing !! Thank you so much for this tutorial very explanatory but not too long and straight to the point ! Thank you for sharing you experiences with us !