

Welcome friends and thanks for stopping by! This has been a busy DIY week for me. I’ve been working on these new high heel planters along with painting my parents’ guest bedroom (reveal is coming soon so stay tuned!). Before I get started on today’s totally fun tutorial, I have a quick and fabulous announcement.
I’ve opened my first Etsy shop! Woohoo! And what will I be selling, you ask? You guessed it: fun and fabulous, sexy and saucy high heel planters! Oh-Em-Gee. This is so fun for me! I’ve named the shop Sophisticated Broad. It describes the high heel planters perfectly: fun, bold, and brassy, yet elegant and sophisticated. It’s the most fun you’ll ever have with six inches! (Ahem, the heel…it’s a six inch heel. Get your minds out of the gutter people!)
These saucy, sexy six inch stilettos make the perfect gift for the girls at the office, for housewarming gifts, as hostess gifts, thank you gifts or simply “thinking of you” gifts. And as a fun, cheeky decorative accessory, they fit anywhere in the home. So check out:
Sophisticated Broad
Now, onto the main event: the tutorial, for those of you who prefer to do it yourself…
Do you remember the first high heel planter tutorial that I posted last week?
I found the shoes for that project at a local thrift store for $3. A pretty good deal I’d say.
For version two, I went to four different thrift stores and couldn’t find anything. So I got online and found some platform shoes on ebay. Apparently, they’re listed under “stripper shoes” and they are significantly more expensive than what I paid the first time around, especially when you add in shipping costs.
In the past, I have made purchases on ebay, but never by bidding. The shoes I bought for the planters were all by bid and I lost several auctions before getting a pair. Only when I bid right at the end of the auction, i.e. last 60 seconds or so, was I able to grab a pair. Plus, it helps to not bid up the price too high early on. This is probably all common knowledge, but for a first timer like me it was all new.
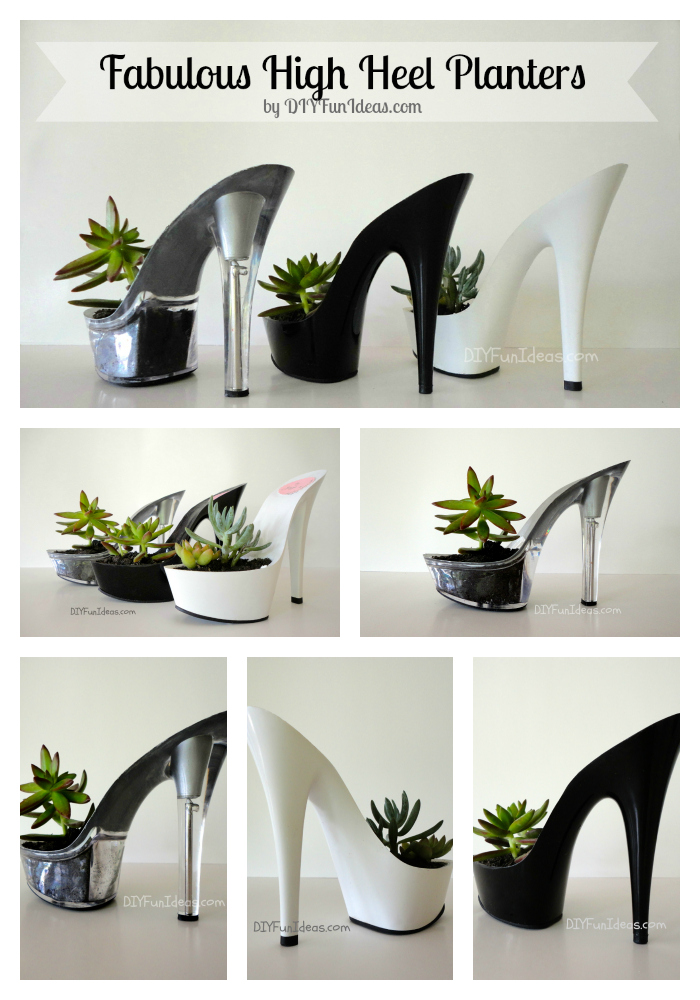
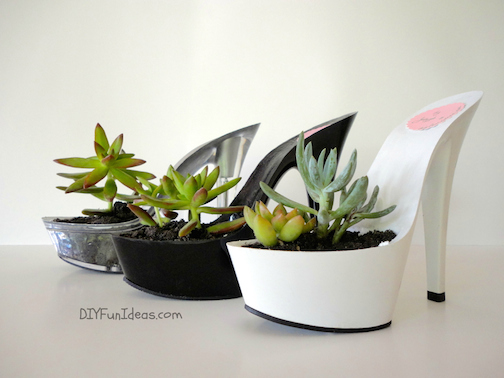
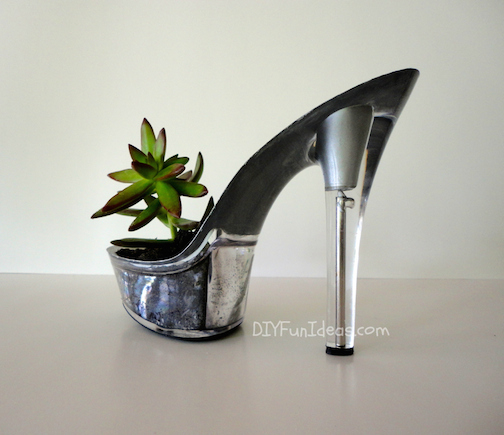
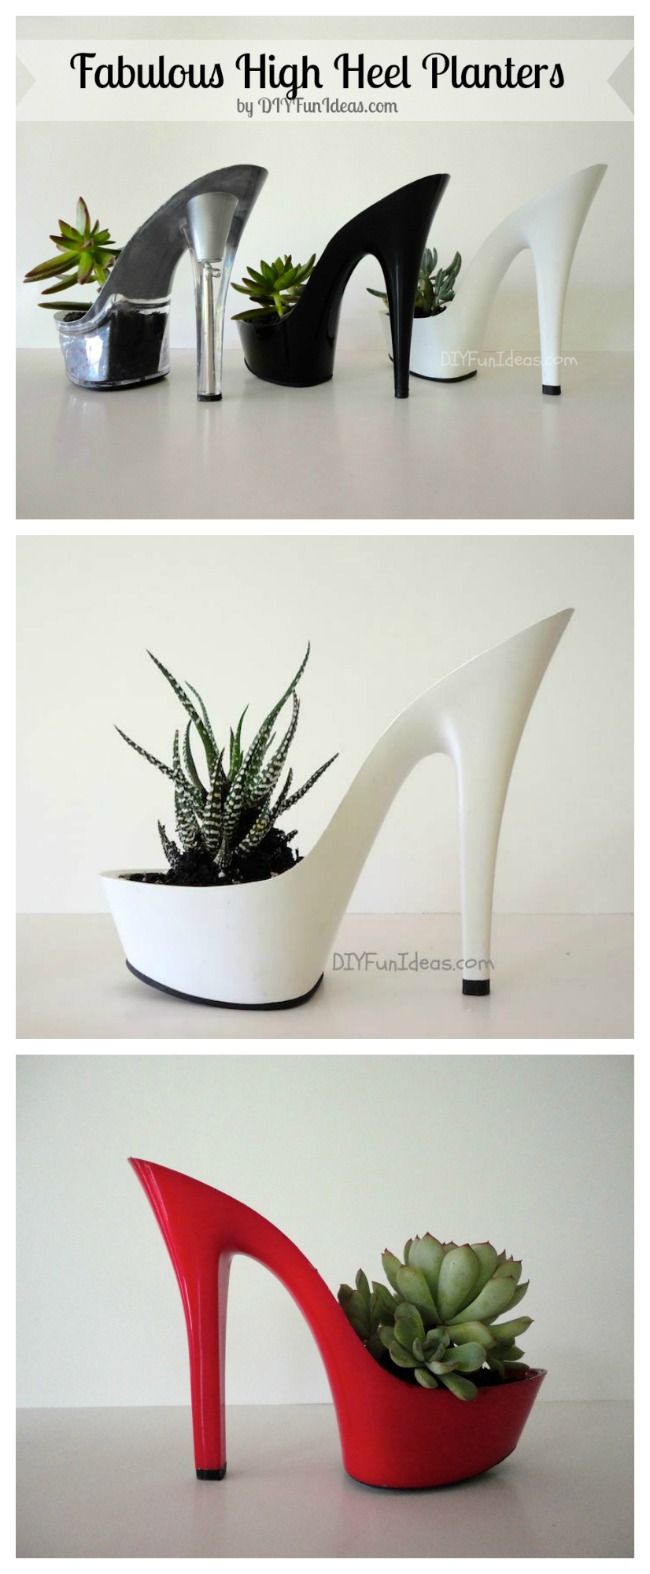
There is a big difference between the version one high heel planters and version two. If you check out the version one tutorial, you’ll see that the platform and the heel are separate pieces attached with a rubber/plastic sole. There’s also a flat piece of metal in there to keep the sole stiff. With version two, i.e. my stripper shoes, the entire sole, heel, and platform is one piece. I didn’t realize this prior to purchasing, but I found that I like the look better than the version one kind. Here’s the first pair I received…
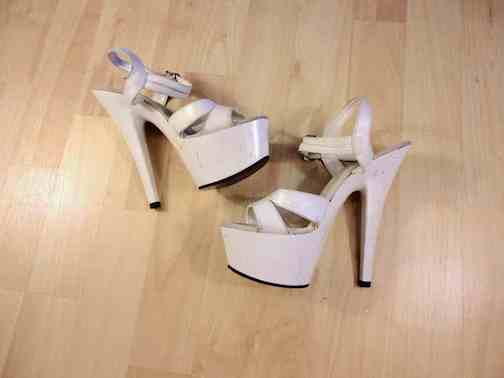
They’re a size 5. I can’t even get my big toe into a size 5! I’m not kidding!! I don’t have huge, fat feet or anything. So all I can figure is that the prior owner was either three feet tall or had had her feet wrapped like a geisha.
Anyway, I removed the soft upper from the sole by first using my dremel to cut a hole in the platform area, then using a pair of pliers I ripped and ripped and ripped the upper off. Those babies were glued on really well. I mean REALLY well.
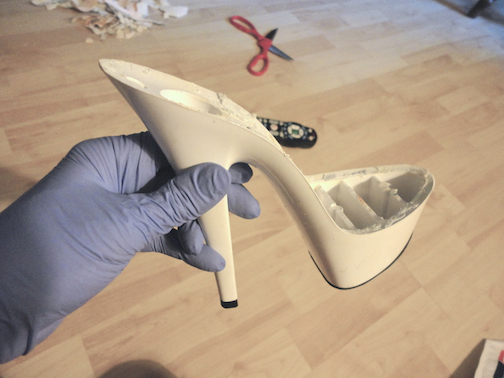
There was a lot of crud and adhesive left after removing the upper. I tried using Goo Gone to get it off, but that didn’t even work…and Goo Gone works on everything. So the only way I could remove the cruddy stuff was to grind it off with the rotary dremel.
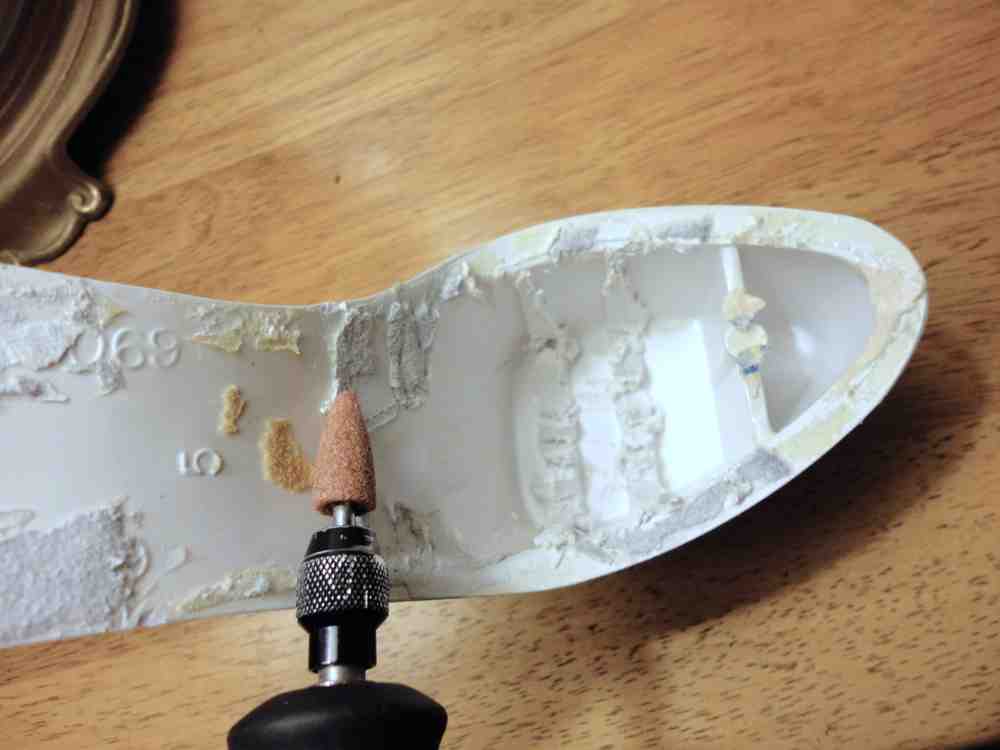
I grinded off the raised numbers too and then hand sanded the sole first with 80 grit sand paper, then 150 grit, and finally 220 grit.
Next, I used a Multi-Max Dremel to cut through the plastic to hollow out the platform. (Have I ever told you how much I LOVE, LOVE, LOVE my multimax!!! So not kidding!) On the version one shoes, the platform interior was rubber, so it wasn’t terribly difficult to cut out. These are a really hard plastic. So while cutting with the dremel, the plastic heated up pretty well and the place started to stink of burning plastic fumes. I ended up having to go outside for better ventilation to cut the remaining shoes. Then, after the platform was hollowed out, I drilled a few drainage holes in the bottom.
Next, I moved on to the work on the heels. There’s a big old honking hole in the heel of each shoe…

I wasn’t sure what to do with that at first. I tried filling it with joint compound, because that’s what I had on hand. When the joint compound dried, it shrank and still left a bit of a hole. I tried two more times and couldn’t quite get it to not to have a dip or crack. So I went out and bought some no-shrink spackle. It literally says “no shrink” on the container and that did the trick. Once the spakle dried I sanded to a smooth finish. For the next few shoes I worked on, I purchased some clear silicone
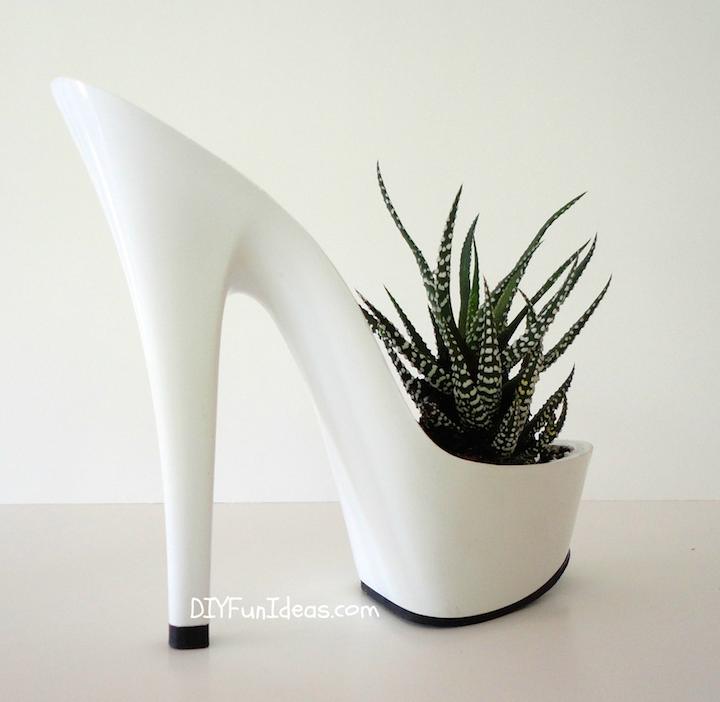
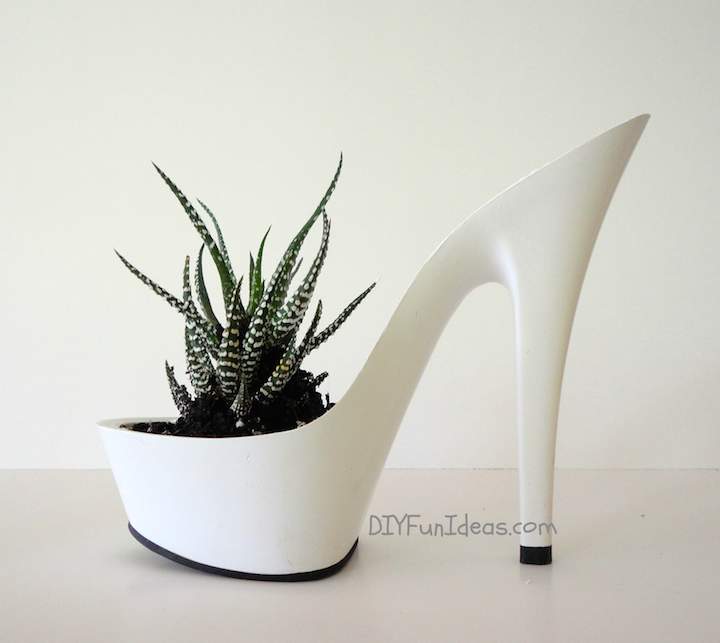
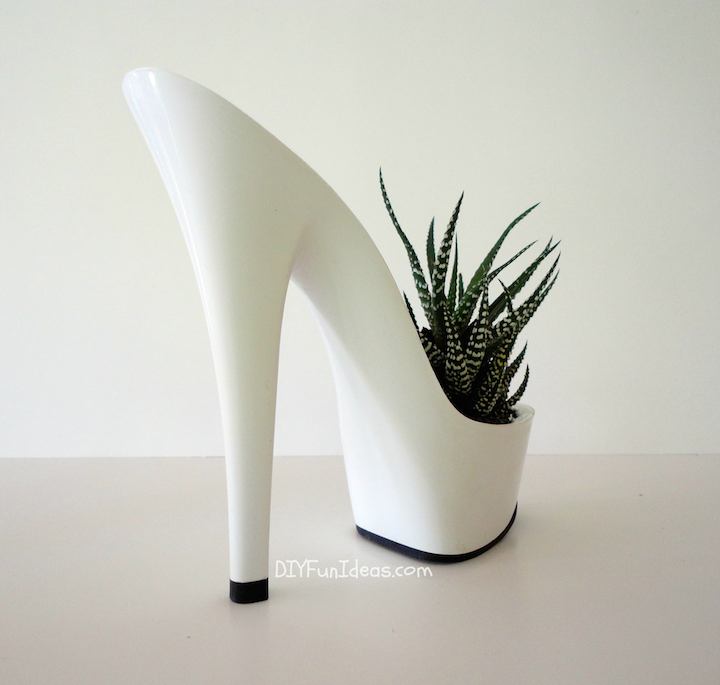
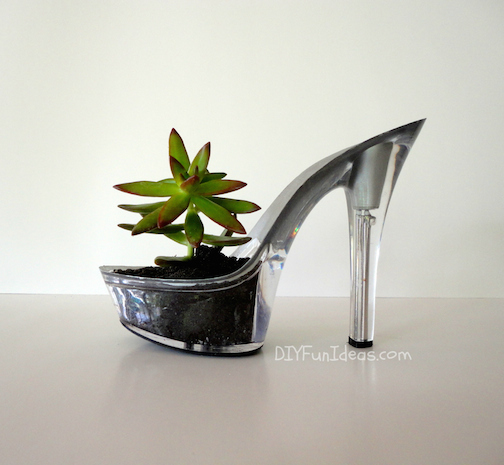
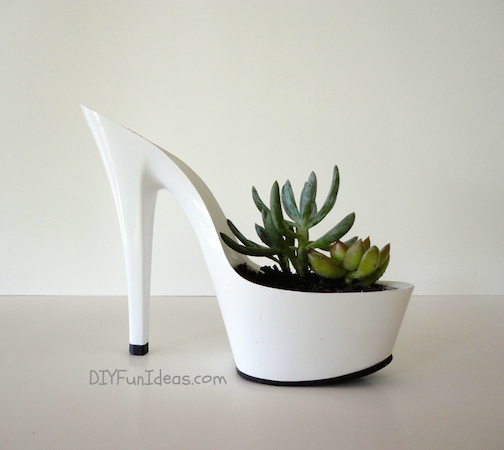
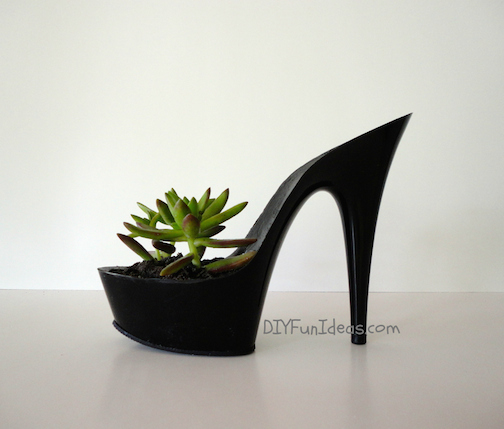
to fill the hole. I filled the hole just to about 1/16 of an inch to the top of the hole, let it dry, and then covered that with spakle — since you can’t really sand silicone. Once the heels were filled, dried and sanded, I painted over the top: white on white, black on black, and then I used silver on the clear lucite high heel planters.
I was originally planning not to paint the lucite shoes, but the sanding made the tops of the soles look scratched. But painting the sole silver worked perfectly. The silver is a perfect complement to the clear high heel planters.
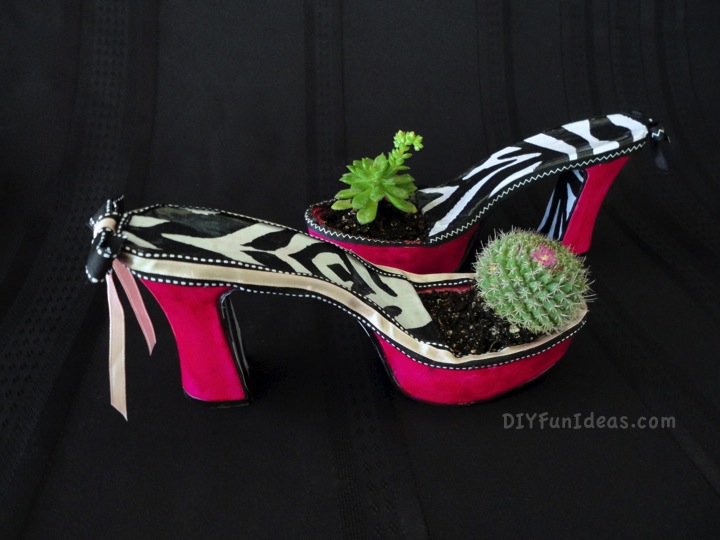
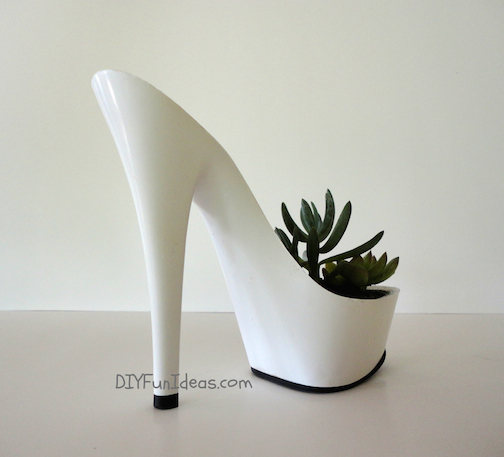
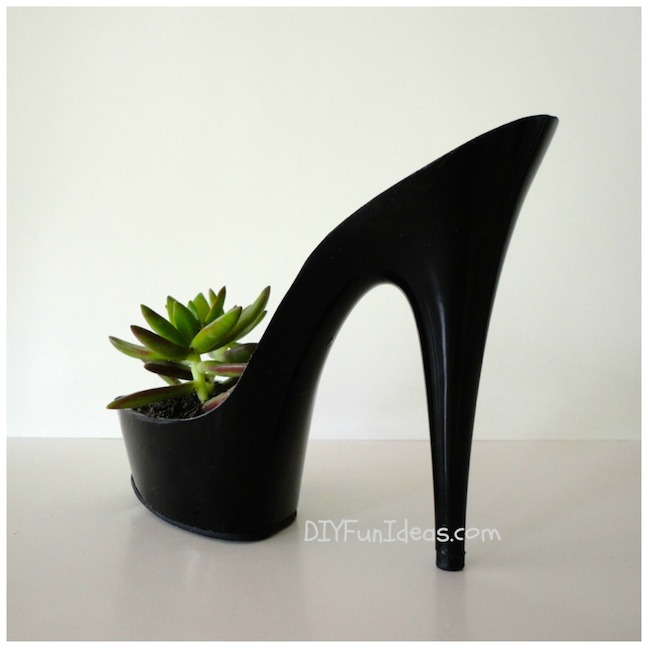
The final step was to plant some pretty succulents in each shoe. And waa-laa! Gorgeous, fun, sexy, sassy high heel stiletto planters!
I loved my first set of high heel planters, but I am ten times more head over heels (get it? …heels. Okay, I have lousy humor) with round two!
Now, don’t forget to ENTER THE GIVEAWAY to win your own high heel planter!
Just enter your email address in the right margin to sign up for email alerts. Then forward your feedburner email confirmation to me at jenise@diyfunideas. That’s it.
Giveaway ends June 15, 2014, 11:59 pm EST. So don’t miss out!
Winner announced June 16, 2014!
And, remember the room with the faux silver leaf painted doors? I’ll be revealing the full makeover in the next few days. So stay tuned. It’s gonna be perdy!
Cheers and have a fabulous weekend my friends and don’t forget to take a peek at my new Etsy shop!

Cheers!
Jenise
This post linked to some of these wonderful blogs and here.
These are insanely fun! Great project!
Thank yo so much Marisa!
Wow these are great! I can’t walk in high heels to save my life but I could definably manage this lol!
haha. That’s awesome! I don’t think I could walk in 6 inch heels either!! And thank you!
This is such a fun and creative idea that I would have never thought of. They look fantastic. I love how so many objects make great plant holders :)
Thank yo so much Lisa!
I love this idea, I pinned it and put it on facebook. I think it is a great girlfriend gift. I would love to get it.
Thank you so much Diane! You can enter the giveaway to win one or they’re also now on Etsy!
Wow..amazing! I have to do a pink pair for my daughter….she loves pink and has gotten in to the high heel recent years…like her mom did in the 70’s..when these were the highest fashion style! Love them!
That would be awesome! I’ve been looking for a pink pair, but no luck so far. I’m thinking of trying spray paint.
G’day from Oz! I’ve just pinned your post to my Say G’Day Saturday board-thanks so much for linking up. Hope you can join in again this weekend.
Best wishes,
Natasha in Oz
Thanks so much Natasha!
Such a unique idea! Love it! Thanks for sharing with us at Your Designs This Time!
Thank you for hosting Emily!
I saw this post in a link up and my first thought was that you had committed some sort of crime against footwear but now that I see the before images I’m thinking, that’s some kind of genius. That tired old shoe has a brand new life, loving this.
Wow!! I found you via ChicOnAShoestringDecorating’s party and knew I needed to click through and check out this project! I’m so inspired!! Uber cute!! I love shoes. I love houseplants. I LOVE this project! I can totally see one sitting on my credenza in the living room, on my vanity in the master bedroom, by the window next to my china cabinet, a pair on the stairs… LOVE it!!
Thank you so much Amber! I love hearing that!
Oh how very cute! I can not walk in heels at all…unless you count my cowgirl boots with a 2.5 inch heal? I follow you, have for awhile…but can not find my feedburner confirmation email.
Hi Kim,
I’ll email you about this. Thanks, Jenise
What a great project. Thanks for linking up to Sweet and Savoury Sunday, stop by and link up again. Have a great day!!
Thank you so much Laura!
Hi Jenise,
These are really fun and unique. I’ll be featuring your post in the Pin It Monday Hop any time today.
Hope you could stop by. Here’s the link: http://pursuitoffunctionalhome.com/?p=5218
Thank you so much Judy! It’s an honor to be featured!!!
What a brilliant idea! Love these!
Thank you Melissa!
Thank you for sharing this post at City of Creative Dream’s City of Links on Friday! I appreciate you taking the time to party with me. Hope to see you again today :)
I’m pinning, then I squeat, I G+ then I squeal again, tweet etc. You get the point. These make me squeal with happiness! I am in love with the clear one. I don’t own a pair of clear ones that I can upcycle AND I have a brown thumb but this would be one plant that would stand a better chance of getting watered than anything else. I see a cactus in my future lol
I got so excited I typed squeat when I meant squeal
Thanks so much for joining us at the Monday party!
Come again!
Hugs
these are just about the cutest things I have seen!!! Love them! Good luck with your shop!!!when I was young, I wore shoes like this! But , alas , no more!!.. I am almost 82! I would break a hip or worse!!! Haha….
Thank you so much Tommie! I’m pretty sure I’d break my hip in a pair of those shoes too! I’ve never able to walk in anything that high.
But are they water tight? The plants will need water. Lol
Hi Valerie, No they are not water tight. I specifically drilled a few holes through the bottom so that they can drain. If you’re planting cactus or succulents then you definitely want drainage for your plants.
I used to be a stripper so I have LOADS of these in storage. I wish I had the heart to throw them out, but there are too many good memories! This is such an awesome idea. Can’t wait to give it a go.
Oh, you’ll have so much fun with these. I’d love to hear how your high heel planters turn out!
I LOVE THIS IDEA!!!! I WOULD LIKE TO FIND IN BRAZIL.
KISSES