

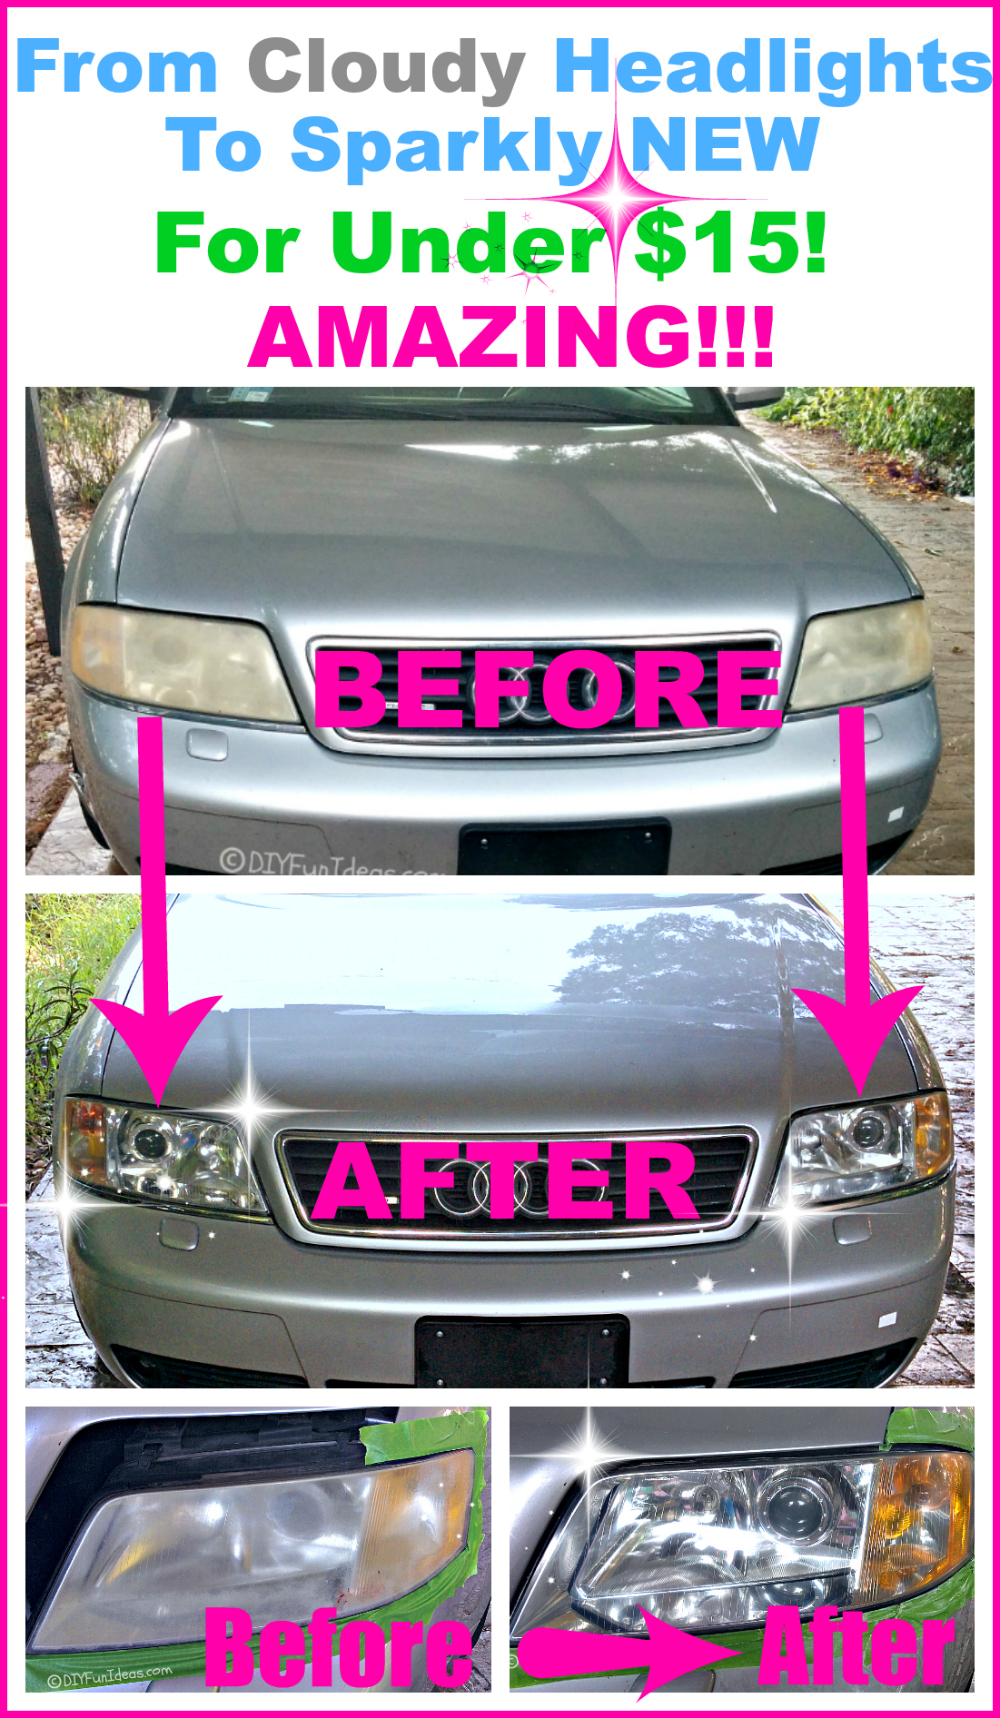
I’ve been driving this little lady for 11 years and she’s been a loyal and reliable friend, but her headlights had seen better days. So it was time for a little makeover.
At first, I thought I’d simply replace the headlight lenses. But apparently, it doesn’t work that way. Instead, I would have to replace the entire headlight assemblies which cost nearly $350 for both headlights!!! Umm…seriously??? That was so not happening.
I thought I’d have to live with my clouded lenses. But the thing that really bothered me was that the cloudiness actually limited the amount of light the headlights gave off and I could really tell the difference when driving at night.
So after doing a little research I discovered this Headlight Restoration kit.
I have to admit that I was skeptical about it. And even worse, I was kind of worried that I just might make my headlights worse than where they started. So after holding off for a while, I finally got tired enough of my messed up headlights and went for it and I gotta say, I am not just pleasantly please. I am totally ecstatic with the results!!! My headlights are seriously good as new.
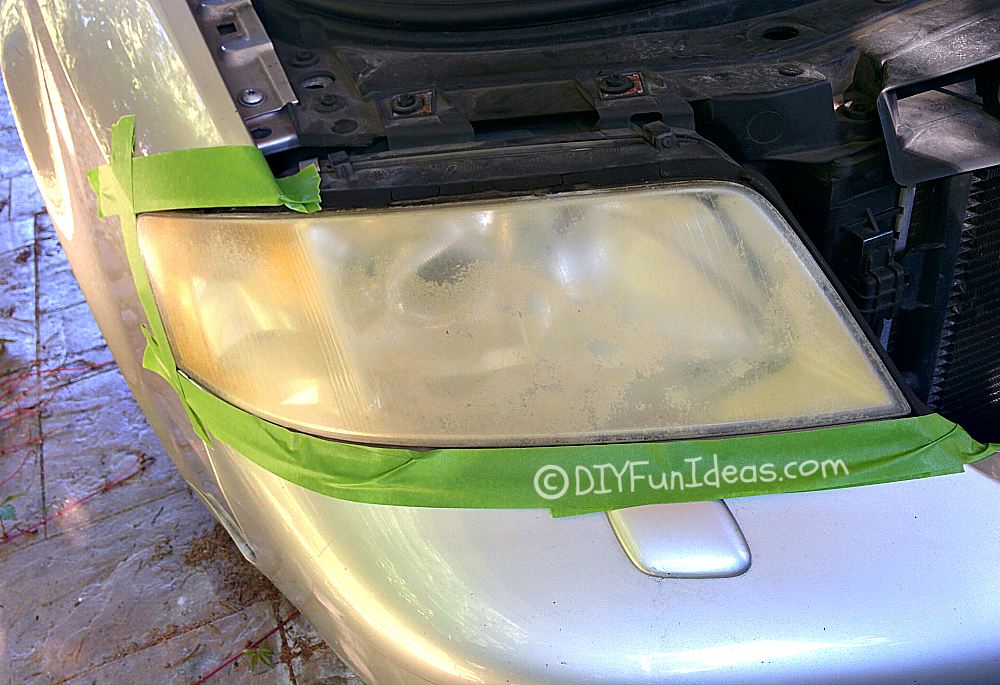
Here’s what I started with….
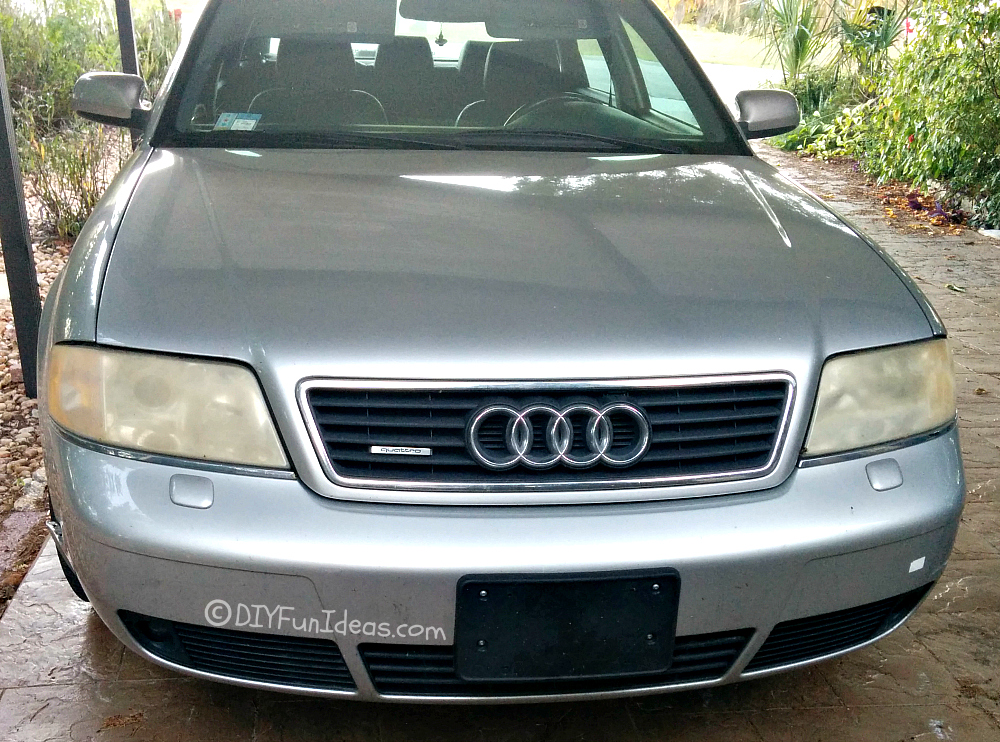
Pretty bad, right?
Here’s the Headlight Restoration kit that I picked up (click here to see)….
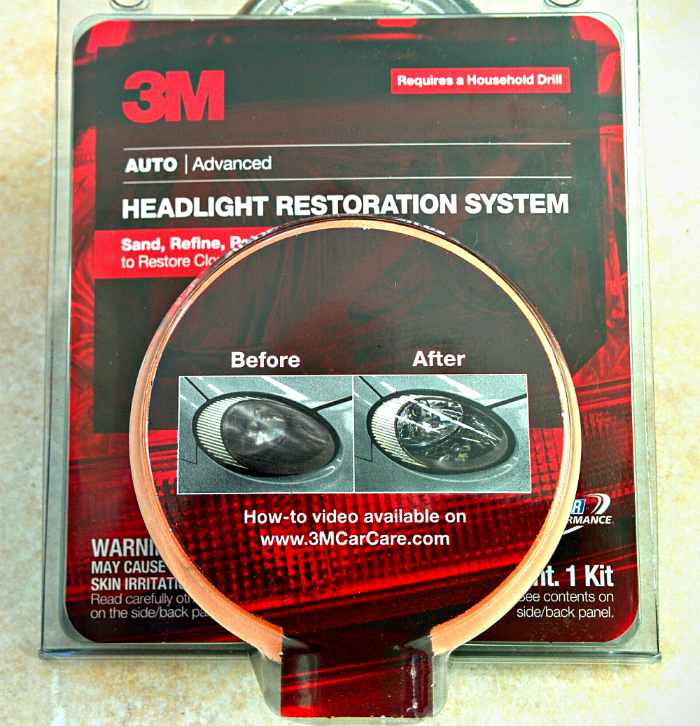
It cost me $14.95. (Note that prices on Amazon frequently shift and may vary from my purchase price.)
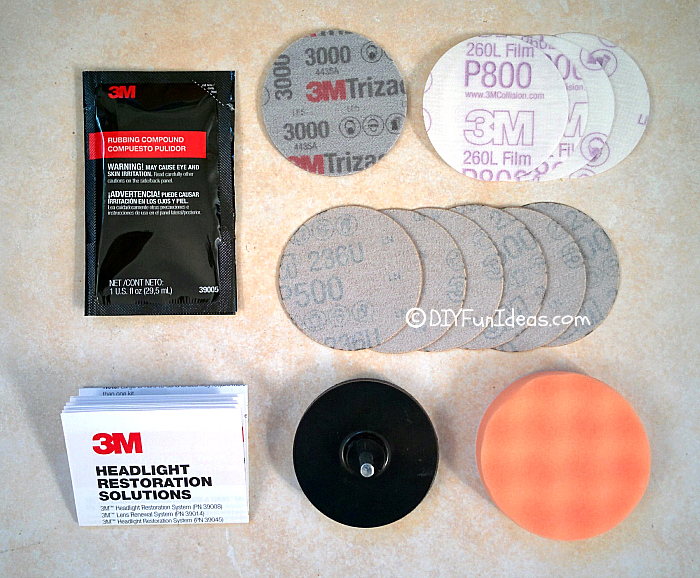
The Headlight Restoration kit includes:
1 – Drill attachment
2 – Six 500-grit pads
3 – Four 800-grit pads
4 – One 3000-grit pad
5 – Sponge pad
6 – Polishing compound
7 – Instructions
You won’t have to apply any elbow grease for this project. Instead, your drill will do all the work. I used my trusty Makita cordless drill. Love the convenience of cordless!!
Here’s how it works…
Headlight Restoration Directions:
1 – Place painters tape around the headlight to protect the painted surfaces. I used two layers of tape, just in case.
2 – Insert the drill attachment into your drill and attach the self-adhering 500-grit pad to the drill attachment.
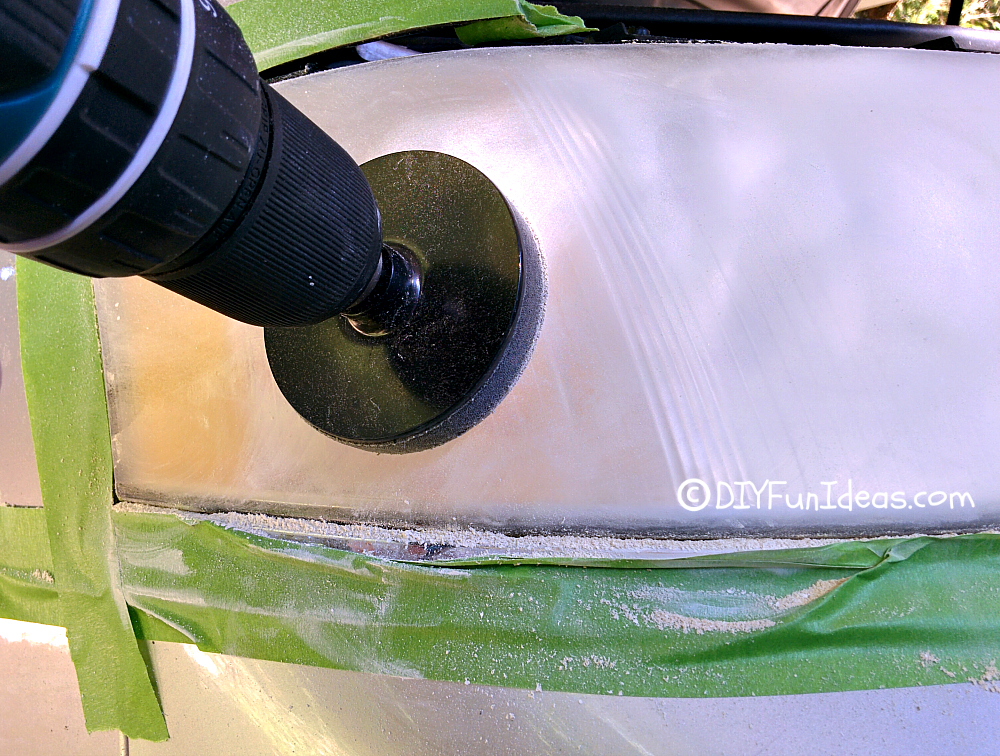
3 – Using the 500-grit pad, sand the surface. I used three 500-grit pads on each headlight and sanded until each pad no longer produced dust. (Notice all the sanded dust collected below the above headlight.)
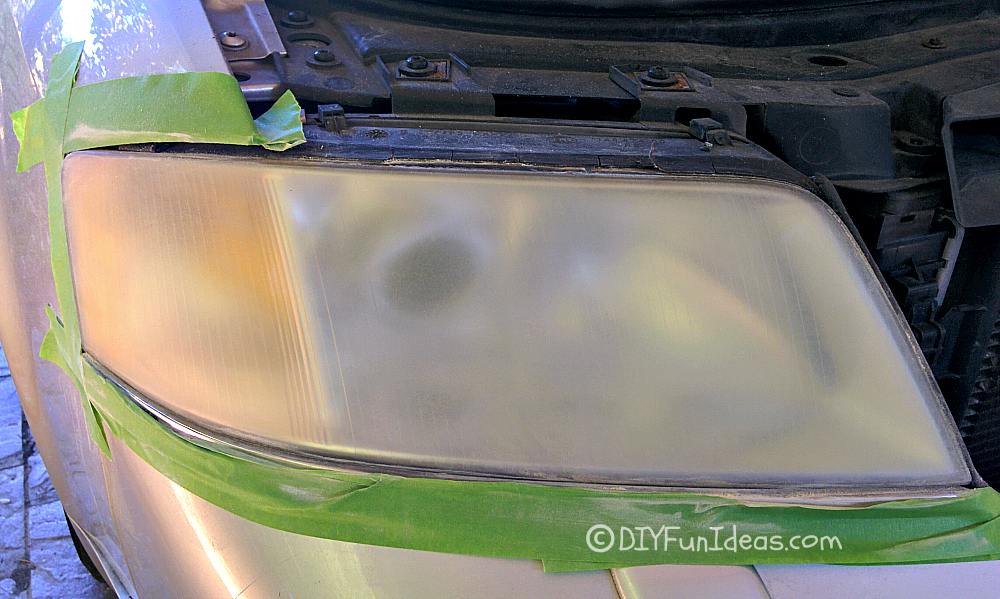
Your headlights will look worse before they look better, but don’t get nervous. Here’s what my headlight looked like after I finished sanding with the 500-grit pad….
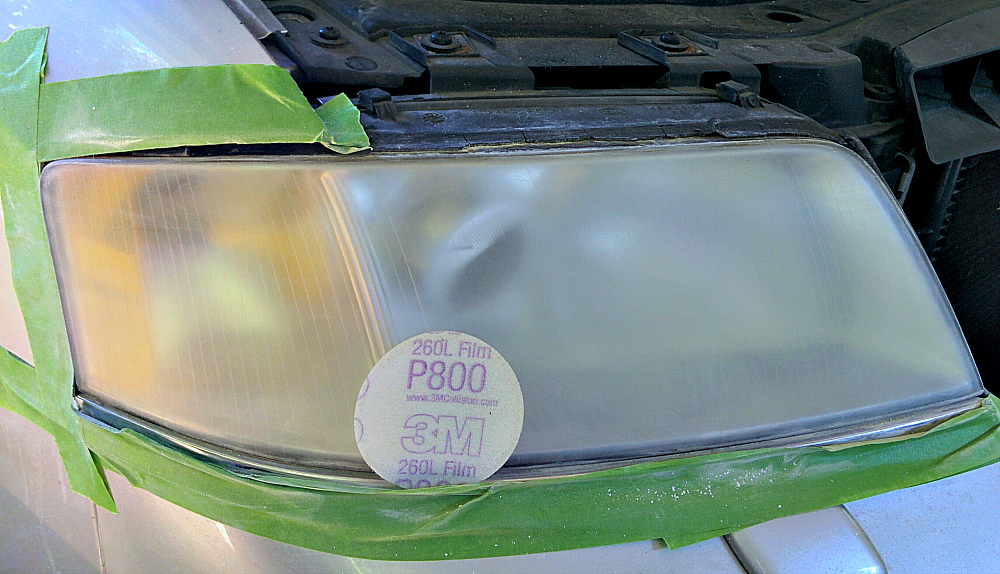
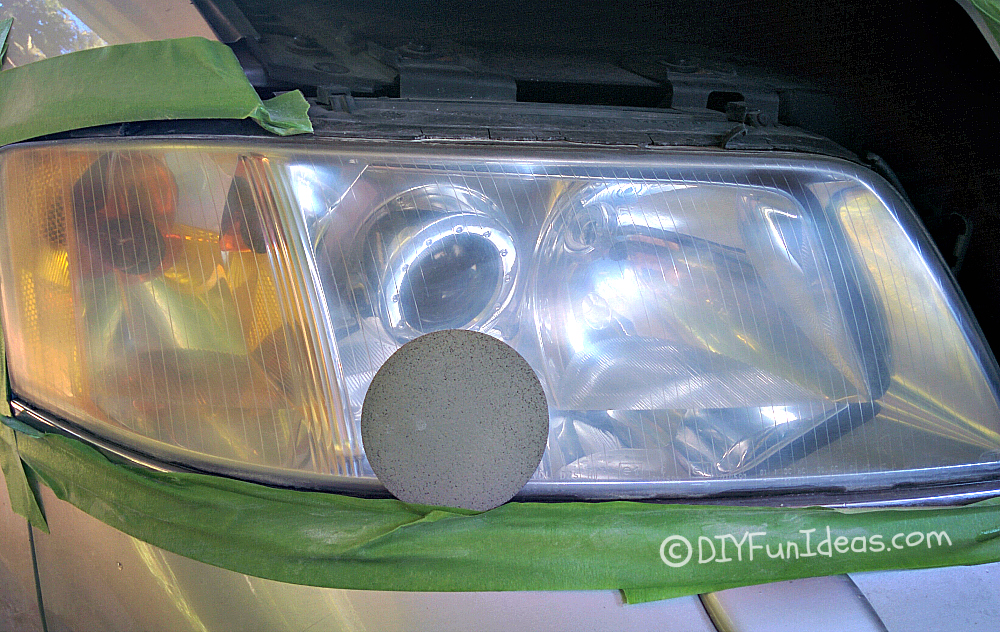
4 – Repeat with the 800-grit pads. Here’s my headlight after sanding with two 800-grit pads….
5 – Moisten the 3000-grit pad and repeat, making sure the pad stays wet during sanding. Here’s my headlight after using the 3000-grit pad…
6 – The final step is to polish with the sponge attachment and polishing compound. The kit instructions say to spread a dime-sized amount of compound on the pad. I actually used a bit more than that cause the dime-size amount was so small.

While polishing, the compound will make the lens surface cloudy. Polish until the cloudiness clears and your headlight lens shines.
Here’s my headlight after final polishing…
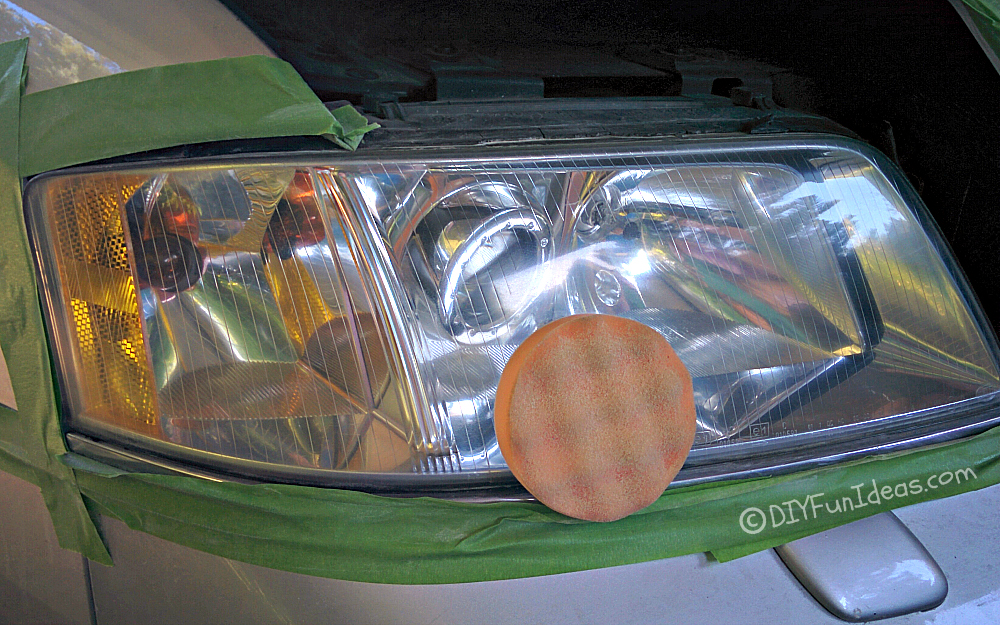
Pretty impressive, right!
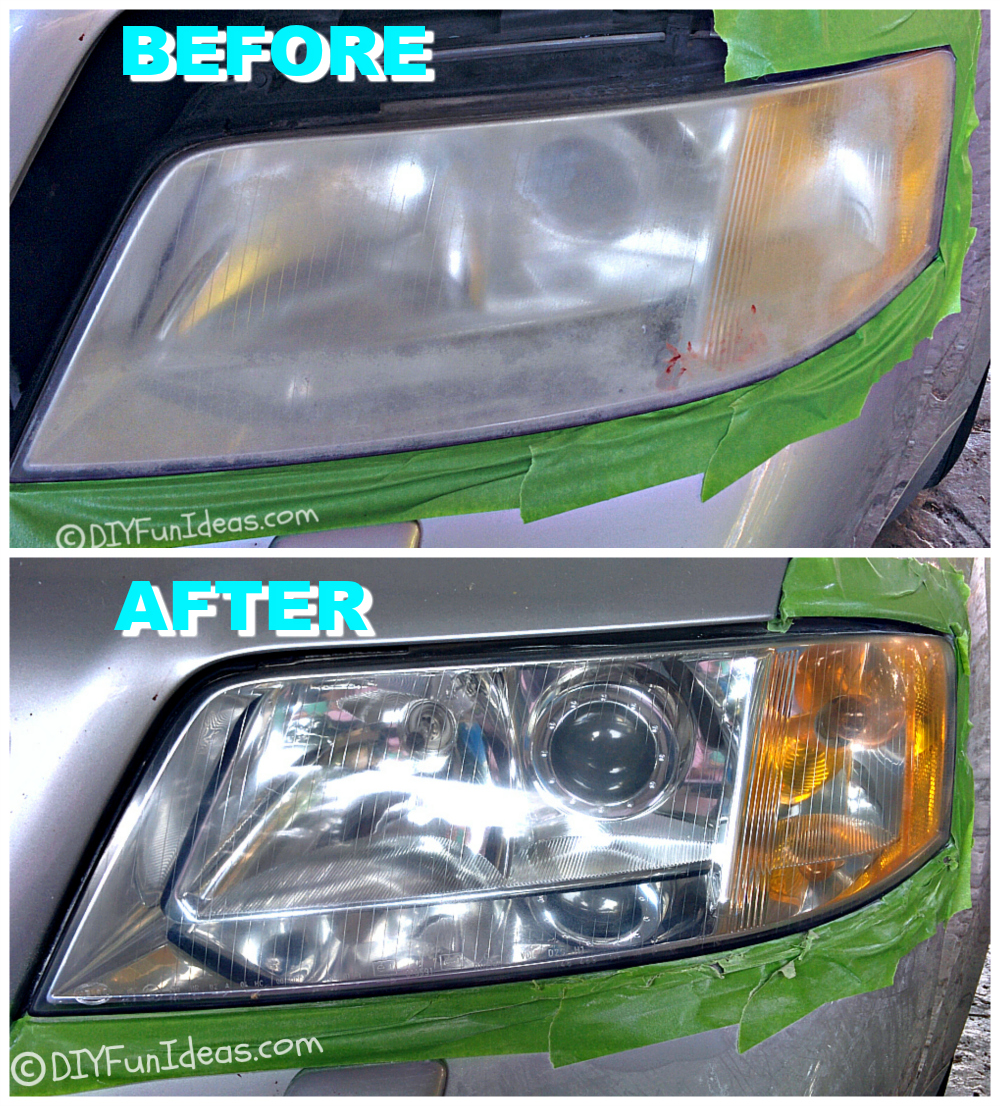
Here’s a look at the before and after together…
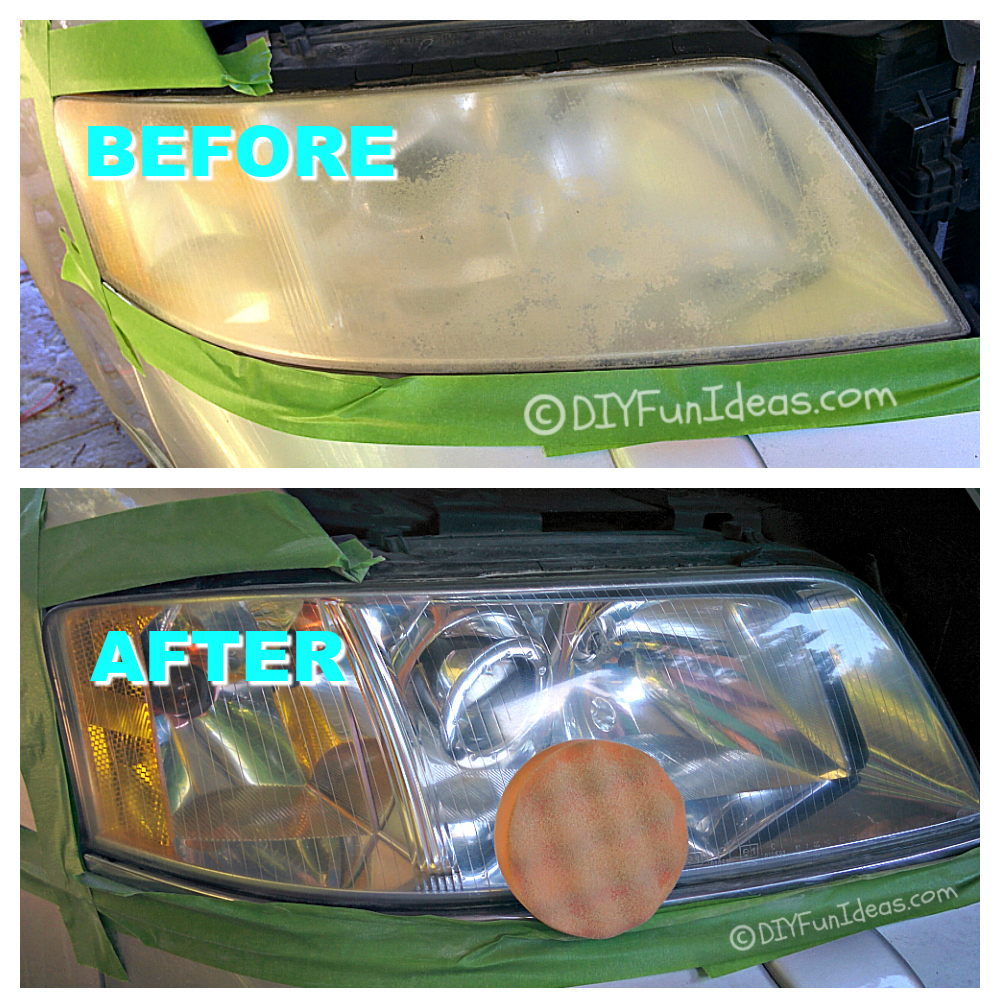
Can you say, WOW!!! I have to admit that I really didn’t think I would get results anywhere near this. I mean, my headlights seriously look brand new.
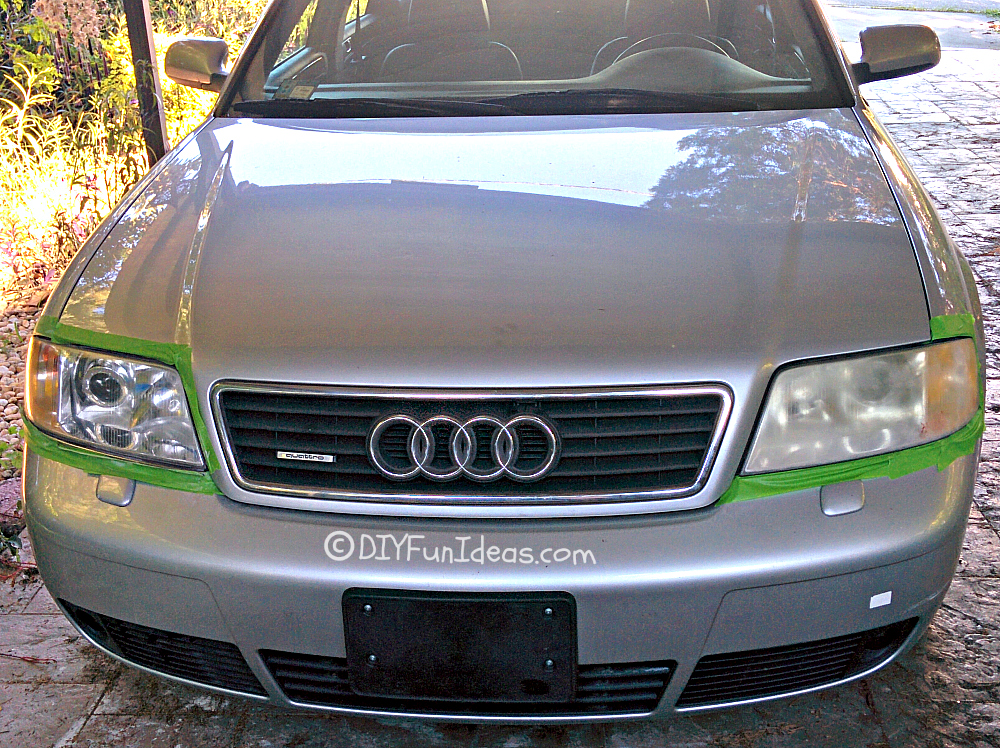
Here you can see the passenger side headlight restored compared to the unrestored driver’s side headlight…
Now check out the before and after driver side headlight…
This is the best $15 I every spent!!! I am so thrilled!!!
If you need your headlights restored, I totally recommend the 3M Headlight Restoration kit!!!
That’s it folks! Please share, share, share with your friends and on Pinterest!

Wow! This is amazing. What a difference!! Thanks for sharing with SYC.
hugs,
Jann
The last step to this is to spray and automotive clear coat over the headlight. The reason is it will return without proper protection. Why this happens is not waxing the headlights as well. Just like your cars paint needs protection so do your headlights. Take care
You can just use toothpaste and a rag, works perfect!
I actually tried this and it didn’t work. I figured my headlights were too far gone at that point.