

DON’T MISS OUT!!! Enter for a chance to win one of TWO FREE Dremel Kits, the must have DIY tool! DETAILS HERE.
Check out this really fun ruler lamp for your kids’ room! The tutorial comes from a dutch site, 101woonideeen.nl. I’ve had the tutorial translated and then added a few recommendations of my own.
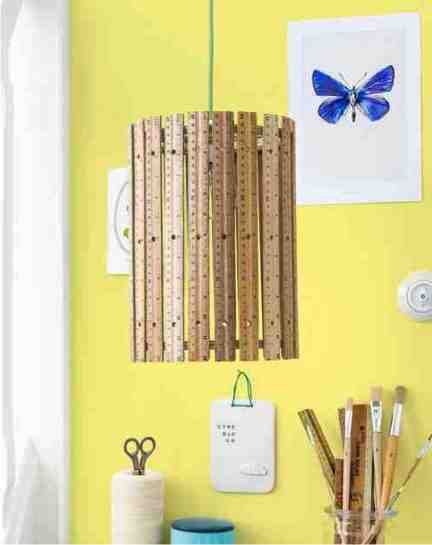
You’ll need about 20 12″ rulers, some light plywood or particle board, glue gun or other type of glue, a light socket kit, and the two patterns from the dutch site.
Download Pattern #1 (lamp base) and Pattern #2 (lamp top). Transfer patterns to plywood and cut using using a jigsaw, Dremel, etc. You’ll now have the top and bottom of the lamp. The hole in the middle of the top circle is for the light socket fitting. Glue the rulers all around the top and bottom wood rings with a hot glue gun. Attach the cord to the socket and insert the fitting into the corresponding hole in the top wooden circle. And you’re done!
If you don’t want to bother cutting anything, I’ve also seen a tutorial for this hanging ruler lamp that recommends using quilter’s cross-stitch hoops as the frame and then attaching the light socket fitting using wire. Either way will work and your kids will love it!
Cheers!
~ Jenise
p.s. Don’t forget to ENTER YOUR EMAIL ADDRESS ON THE RIGHT for all the new fun ideas! Then FOLLOW ON PINTEREST & PIN THIS PAGE so you’ll always find it. You can Like us on Facebook too! Then stay tuned for more fun & fabulous DIY ideas and inspirations!
(Secret: There’s some exclusive content on that thar facebook page…sshhh!…okay, I guess I just ruined the secret.)
Cheers!