

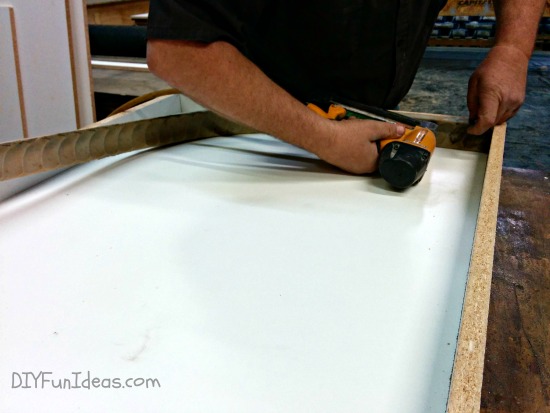
For the external edges cut 2 ¾” strips of melamine. Since the melamine is ¾” thick, this will give us a 2″ thick countertop.

Use a finish nailer to attach the 2 ¾” melamine sides. And here’s a tip: you don’t need a million nails. You do want to be able to take the form apart later on, so one nail ever 12″ or so will do.
If your countertop has a curved edge, use a 2 ¾” wide strip of the ¼” plywood you used to create your template for that edge.
Here’s what your form will look like at this point…

Don’t worry about those open interior corners. We’re going to fix that in a minute when we add our decorative edge molds.
There are many different decorative edges you can purchase. We chose a decorative rope edge made of a polyurethane rubber. You can check out different mold edge options here.
Use a brad nailer with 1″ brad nails
to attach your edge mold. You want to shoot your brads in through the thickest sections of the mold. The brads will sink slightly into the rubber so you will not see the brad heads shaped in the finished concrete product.
Some decorative edges do have an obvious top and bottom. Ours didn’t. But if you use an edge with a top and bottom, make sure that the top is installed downward since at this point everything is upside down and we’re working with a mirrored image.
This is what the attached edge mold looks like…
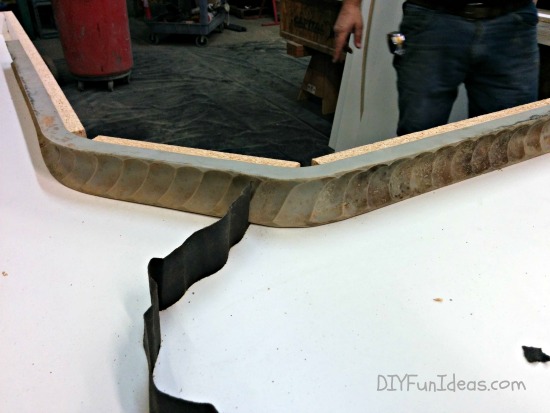
See how we now have those opened internal edges covered.
For fun, we decided to add a broken flagstone edge mold on one corner…
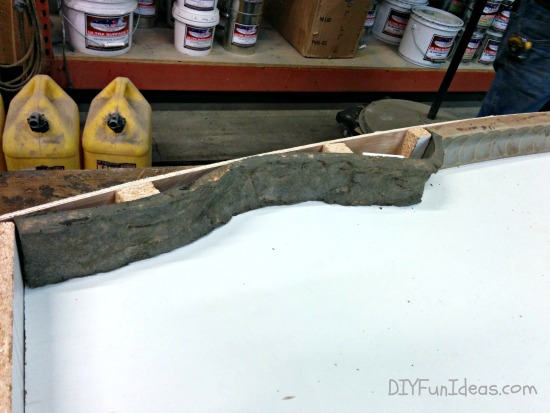
Notice the little cut blocks behind the mold? Those are nailed in and will give that edge some curves. You can also see that that side is our radius edge where we used the ¼” plywood instead of the melamine board to enclose the side.

Seal all joints by running a bead of 100% silicone black caulk over the joints, including the roofing papered joint. Then smooth the caulk with the side of your finger. It’s recommended to use black because it’s a lot easier of see on the white surface. Be sure not to leave any smeared caulk on the melamine. Any impressions, no matter how slight will show on the finished product.
If you do get caulk smears, clean them up with a cotton cloth.
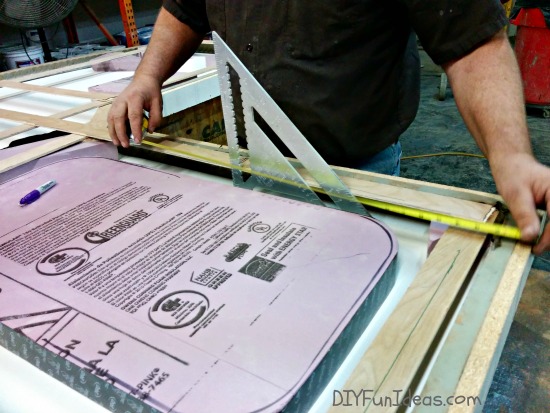
Now, let’s work on creating the hole or “block-out” for the sink. The block-out is cut from a 2″ polystyrene panel. These panels are generally used for insulation and can be found at most home improvement stores.
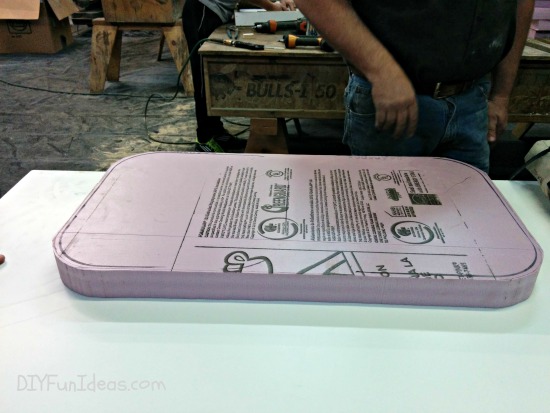
In the above image, we’ve already cut the sink block-out.
New sinks usually come with a cut-out template. If you have a template, trace the template onto to the polystyrene and cut it out. We used a band saw to cut the polystyrene, but a jigsaw
will work great too.
If you don’t have a template, turn the sink you will be using over and sit it upside down on the polystyrene so that the drain opening is facing up. Then stick your hand through the drain opening and trace along the inside edges of the sink. Cut out your traced form.

Use a sanding block to smooth out the edges.

Wrapped your smoothed edges with 2″ PVC tape. Ben recommends the Orbit brand
tape. It’ll give you a super smooth finish to the inside edge of your sink.

This is the part where we take a short intermission so Lily can go potty…

Yes, I brought my furry little monster to class. There’s a long explanation that you can read about here. Needless to say, my attempts to be inconspicuous with the pooch lasted about five minutes. So not only was I the only female in class, but I was the girly girl with the pocket pooch, and not ashamed of it damn it. :-)
Now back to our regularly scheduled program…
Next, remember your template? Lay it over the prepared form.
To support the template on the form, cut out a few blocks of scrap polystyrene and place it under the template.

On the right side of the image above you can see what I mean by using scrap polystyrene to support the template.

Once you have your template all centered, find the spot where you marked the sink center.
Use your center mark to center the sink block and attach the sink block to the melamine with a couple of 2½” screws, making sure to leave room on the back of the sink block for a faucet hole.
Caulk the sink block-out.
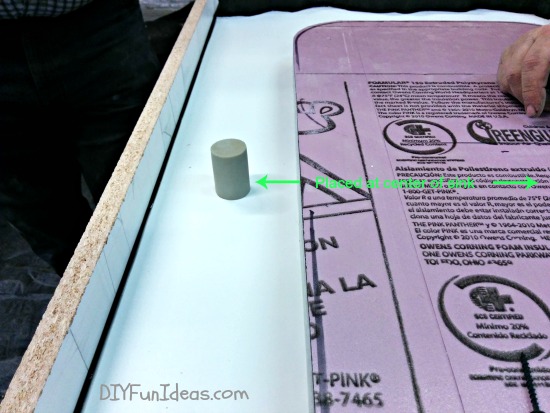
Center your faucet hole plug and screw it into the melanine with a 2½” screw. The faucet plug doesn’t need to be caulked because it will be covered by the faucet after everything is installed.
The final step in preparing your mold is to cut and place a small block of melamine over any outside corner edge molds (see arrow below) and use your brad nailer to nail them down. You’ll notice when bending the edge molds on the outside corners, they will tend to wrinkle slightly on top. These blocks will help keep the integrity of the mold shape on those corners.
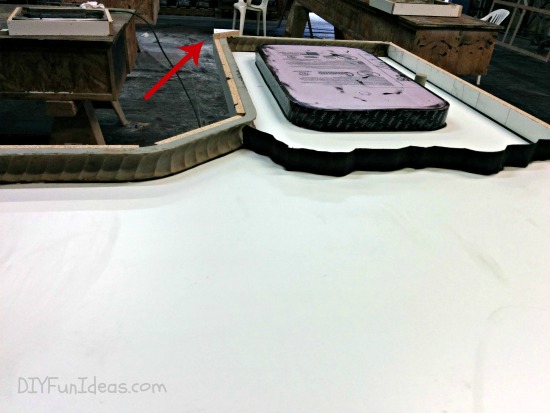
As you can see in the above image, those blocks are not necessary on inside corners which do not wrinkle.
And there you have it. Your mold is complete. Now, check out Part 3 of the series: Mixing and Pouring Your Concrete.
And don’t forget to sign up for email alerts so you never miss a fun DIY…

[Special thanks to Countertop Solutions for inviting me to sit in on their class so I could bring you this fun tutorial!]
This post linked to some of these totally fabulous blogs and Remodelaholic.
Pages: 1 2
This is such a great tutorial. I love how you added the veining.
Thank you so much Stella. That’s so nice of you to say. I’m so happy with how it turned out and can’t wait to build my own!
HAVING BEEN A LICENSED BUILDER IN MICHIGAN FOR MORE THAN 25 YEARS, I FOUND YOUR ARTICLE & IT’S GORGEOUS PICTURES FASCINATING!!! I AM NOW CONSIDERED DISABLED BUT, AM LOOKING FORWARD TO THE NEXT INSTALLATION OF YOUR TUTORIAL! I WOULD LOVE TO GIVE IT A TRY….MAY NEED SOME HELP, BUT I WOULD LOVE THEM IN MY KITCHEN. YOU GO GIRL!! DON’T LET ANY MAN TELL YOU “IT CAN’T BE DONE” THOSE ARE THE ONES TOO LAZY OR NOT SMART ENOUGH TO FIGURE OUT HOW!
Hi Laura, Thank you so much for your comment. It totally made my day and put a great big smile on my face! I totally agree, I never let anyone say it can’t be done. Another reason people tell you that is because if they can’t do it then they don’t want to see others succeed. I don’t pay those folks any attention. Anyway, should have the next post coming soon. Have a wonderful evening!
I LOVE It!!! You go girl!! I am a Custom Decorator and owned/operated my own upholstery,drapery and commercial/residential awning business for 22 years. I had to get my Commercial Awning contractors license which led to full on building and I am so proud of women who know they are capable of doing whatever they love. You are an inspiration to me to keep learning and loving what I do even at 58! Thank you for the information and inspiration! I will be doing this for my kitchen and then others too! I now donate most of my labors to women who are alone and need work done. I teach them as I help them is my greatest joy to pass on what I know and I can see you choose to do the same.God Bless You!!!!
Wow, Johnette, this is one of the nicest things anyone’s said to me. You are so thoughtful! You sound like an amazing woman, giving back to your community. I too am a big believer that you should never stop learning. Learning to do new things is what keeps me inspired and fulfilled. If you have any questions when you start to work on your kitchen, please let me know.
Looks amazing. Thanks so much for the detailed tutorials. This is my “someday” project. Found this on Create It Thursday #90.
Thank you so much Sharilee for stopping by. I hope your “someday” project won’t be too far away. I’m actually going to tackle a concrete bathroom vanity top with integral sink pretty soon and then later this year the kitchen. Should be fun. :-)
Wow this is so neat, and love them! Thanks for sharing how they were done!
Thank you so much Robin!
Thank you so much Robin!!!
Wow, what a great tutorial! I have always thought that concrete counters looked awesome. Thanks for sharing with SYC.
hugs,
Jann
Thank you so much Jann! And thank you for hosting each week!
I’m just finishing the plans for my new home. The actual building should begin in September (OK, so maybe I’m a bit hopeful! ). Anyway, I was going to put in granite or marble countertops. Now I’m not so sure. The cost of using the concrete countertops versus the other two can give me considerable cost savings. Also, I can be creative by using different colors and different styles of veining. Now you’re given me a alternative that will save me money (the savings on the countertops can be used in upgrading other areas of the structure)! I started thinking about where I can substitute concrete rather than using tile, or brick or stone, etc. and extend my budget. Thanks for the tutorial you’ve given me a lot to think about! ! I’m going to take the hands on course. My pocket Yorkies (Sugar and Honey) much travel with Mom but I’ll spare the class their supervision! Vegas must have a doggie spa. Shouldn’t it?!!
Doggie spa in Vegas? oh please! In Vegas I’m sure can find them a little castle with a personal chef. :-) I’m so excited to hear that you’re thinking of doing your own concrete counters! I guarantee that you’ll love it. If you like to DIY, the process is really fun too. I’m going to be doing a bathroom vanity top with integral sink soon and my supplies just arrived today! I do have to finish a few other projects first (that’s my rule or else I get spread out too thin and nothing happens), but I can’t wait. Please let me know what you think after taking the class. I want to hear more!!! And Ben is so nice. After taking the class you can call him anytime if you have questions or need help with your counters.
We were looking for someone to show us how to do this and I came across this. How cool. Am I missing something after making the mold how do we mix and pour the concete. Where is the rest of the tutorial?
Hi Dwight!
Here is part 3 (mixing & pouring): http://diyfunideas.com/part-3-mixing-and-pouring-concrete-countertops/
and
Here is part 4 (grouting & sealing): http://diyfunideas.com/grouting-and-sealing-diy-concrete-countertops/
This week I’m also working on pouring and installing a stamped concrete tiled driveway. So planning to have that tutorial up sometime next week. Let me know if you have any other questions! :-)
I paid someone to pour a concrete outdoor kitchen countertop for me. He said it was solid concrete, but it ended up being just about 1/4 ” thick over some pressed board of some sort. It ended becoming very cracked and warped-of course after the guy went out of business. I am wondering if doing your project with the veining would make those spots less strong for outdoor Colorado weather, heat and freezing? Can concrete be painted? If so, with what kind of paint?
Hi Claudia, Sorry to hear about your experience. :-(
As far as the veining, the answer is no, it will not compromise the integrity of the slab. The veining is made of the exact same mix that is just colored differently. So it’s no different than any other part of the slab. And, yes, the pieces made using this process will definitely stand up to the Colorado weather. I do know that Ben does recommend using a specific sealer for outdoor use. I’m not sure exactly which sealer that is, but if you decide to use this process for your project, he will tell you which one to use.
If your looking for the edge mould web page the new url is:
http://countertopsolutions.net/st/wp/product-category/concrete-molds/concrete-countertop-edge-molds/
Thanks Sean. I’ve gone ahead and updated it within the post. :-)
So are there any pictures of what it would look like without that special product the average joe can’t get? I want to do this but I have no idea what to expect it to look like without that ingredient so I was hoping to see another picture.
Hi Danette,
Without the marbleizer it will look like a plain solid color concrete countertop. If you google concrete countertops you’ll be able to see lots of concrete countertops in all different colors. That’ll help you decide if you prefer to make one with or without color.