

Welcome to the final chapter of the Making Concrete Countertops Like The Pros series. This is where it starts getting really exciting because we’re just so close to seeing the amazing final product! So hang in for this final stretch. Your beautiful concrete counters are just in reach!
So, for a quick recap, in part 1 we covered creating your template. Part 2 covered building your form. And part 3 covered mixing and pouring your concrete.
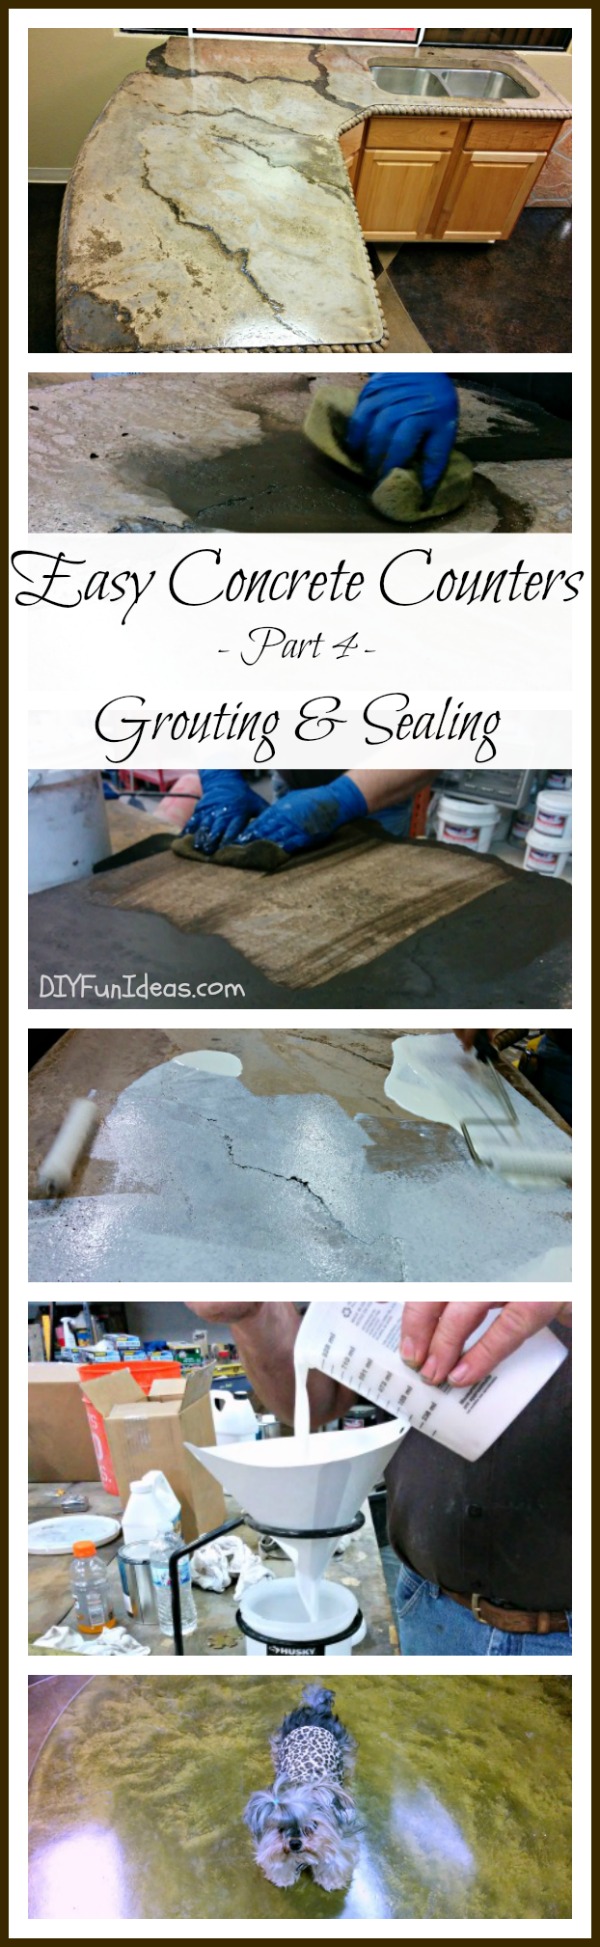
The final steps now are grouting and sealing. Oh, we are so close!
Since step 3, we’ve waited our required 48-72 hours for our concrete slab to cure. (Actually, in class we used a mega huge heat canon gun overnight to apply direct heat, which sped up the curing process. But if you don’t have one of those, and most of us don’t, then just chill for a few days.)
The amount of time it will take to cure is dependent on temperature and humidity. If your slab is in a hot, humid climate it will cure faster.
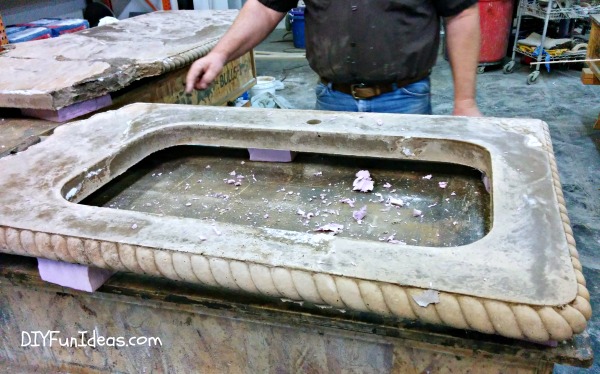
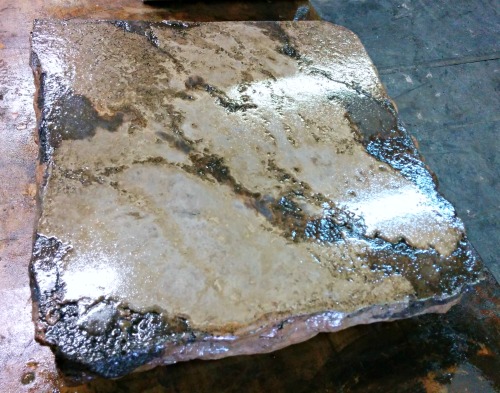
Here is our cured slab…
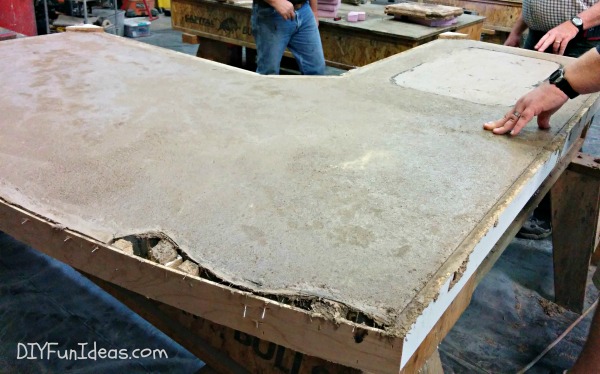
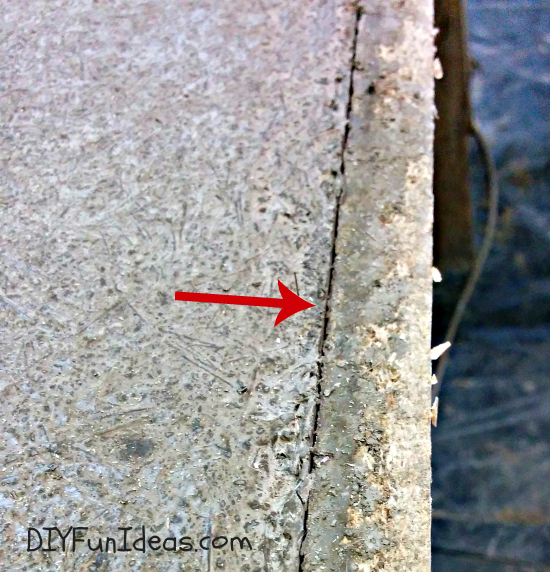
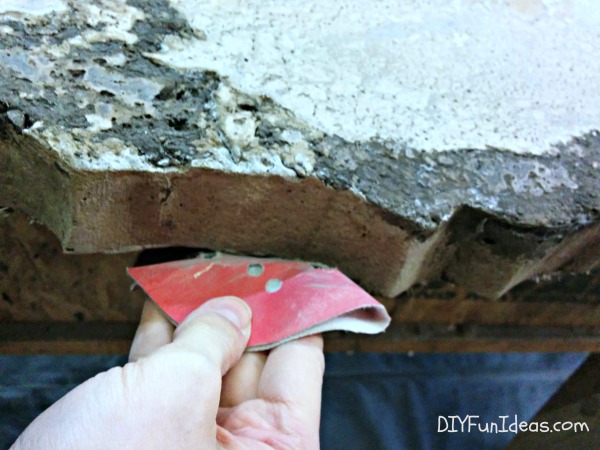
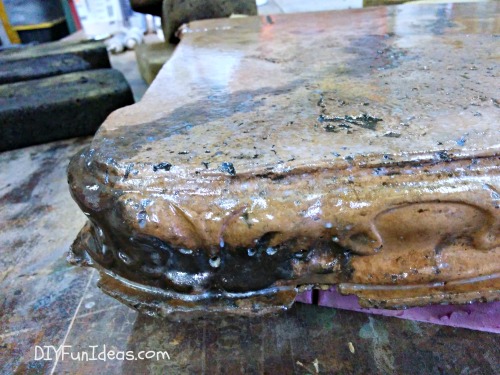
But if you’re wondering exactly how long to wait (umm, 48 hours or 72??) before you can move to the next step, you’ll know your slab is ready when the concrete pulls away from the mold edges like so…
Just like making a cake, right? Well, sort of. …Okay, not really at all. But you know what I mean.
One question I had to ask in class was ‘how come we didn’t lay a plastic cover over the concrete during curing?’ I always thought that was part of the curing process. Ben explained that some people have used that practice to reduce what’s called “curling” of the concrete. Basically, the edges of the concrete can curl either up or down due to a moisture differential between the top and bottom of the slab. You can read more about concrete curling here. But for our purposes, if you flip your countertop over at 48-72 hours max after pouring and lay it on a surface that will allow air to flow around the entire slab (which we’ll do in a minute) so that any additional moisture can evaporate, then you should not have any issues with curling.
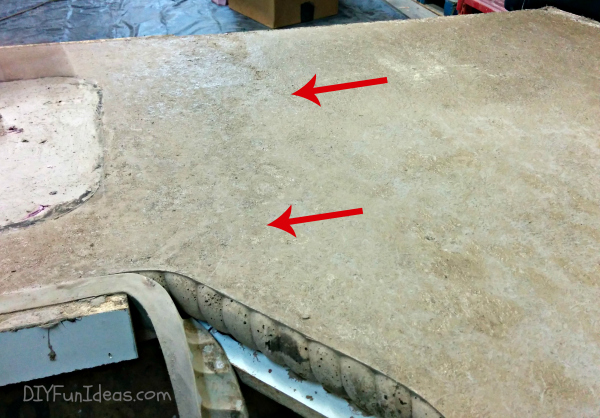
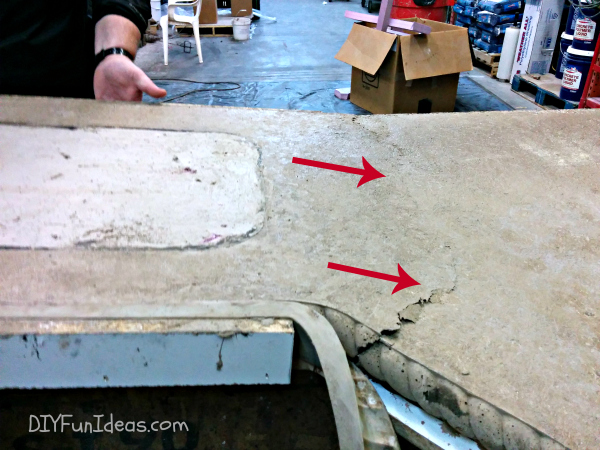
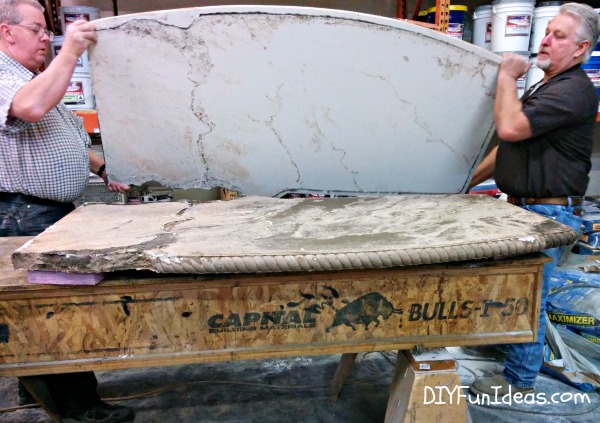
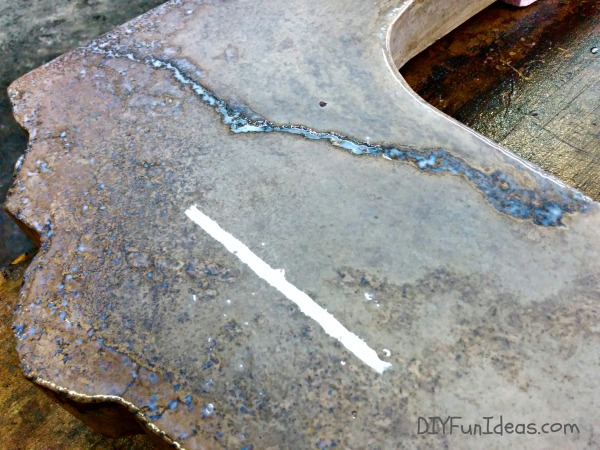
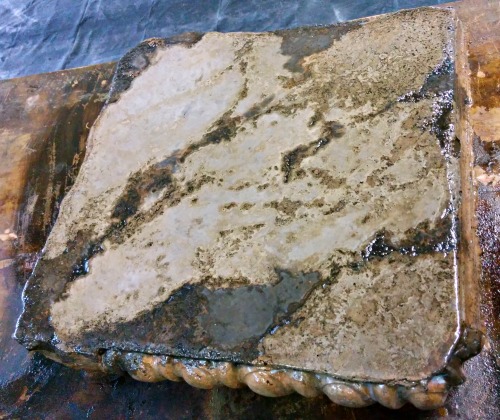
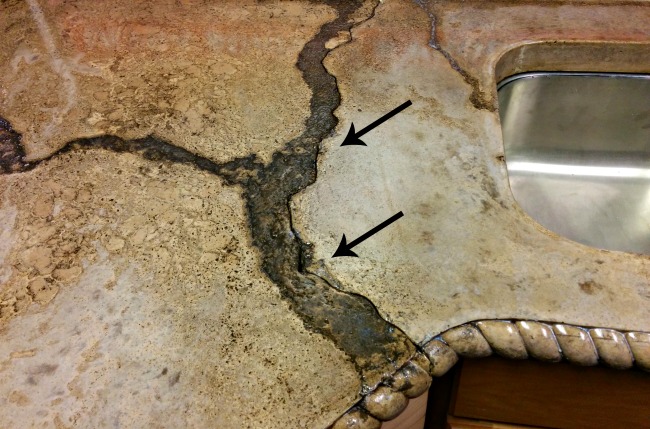
Now, if you recall, we built our slab in two pieces, placing some roofing paper along the line where the two pieces connect.
The arrows show where the two sections connect…
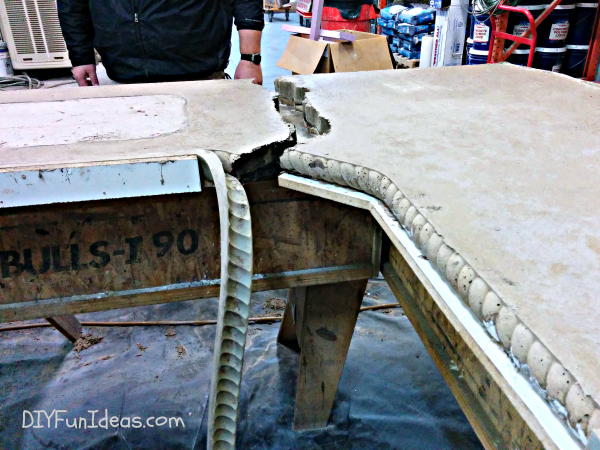
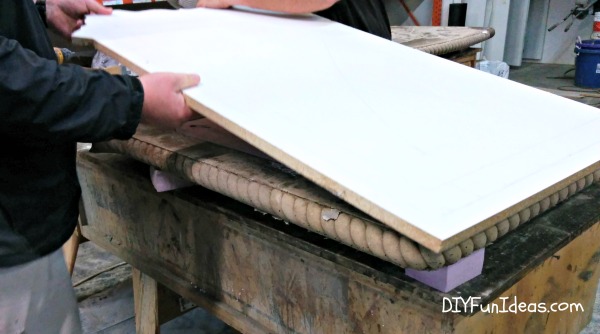
Our job now is to separate the two sections so that we can turn over the slabs. To do this, first remove the form sides where the break is. Then gently lift one side of the slab…
Since there’s only a very thin layer of concrete over the roofing paper, the slab will easily break at the right point. Don’t worry about the break looking perfect. This is the bottom of the slab that we’re looking at right now so no one will ever see this view of the countertop.
Next, unscrew the faucet plug…
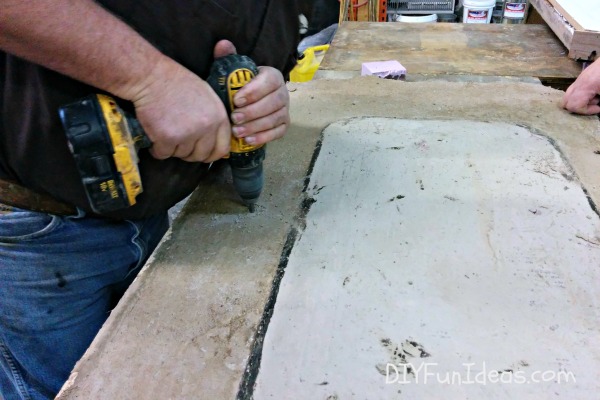
You may need to scratch out a little of the concrete to get to the screw.
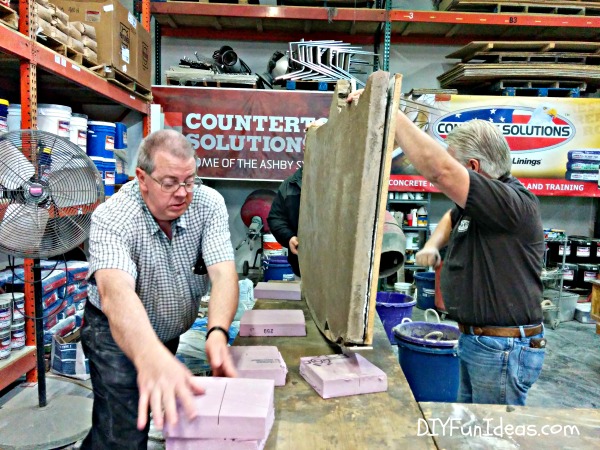
Then it’s time to flip the slabs. When we turn over each slab, we are going to lay each onto polystyrene blocks (remember we used polystyrene to make the sink cut out).
So turn you slab on it’s side and place your blocks down. Then lay the turned over slab onto the blocks. Having these blocks under the slab will to allow air to circulate and dry up any remaining moisture.
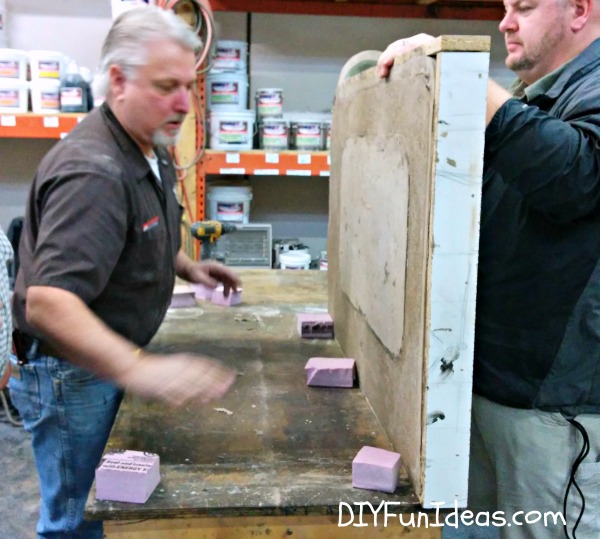
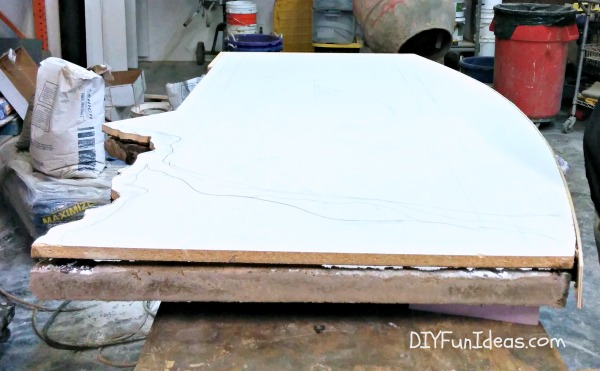
Here’s what the first turned over slab looks like…
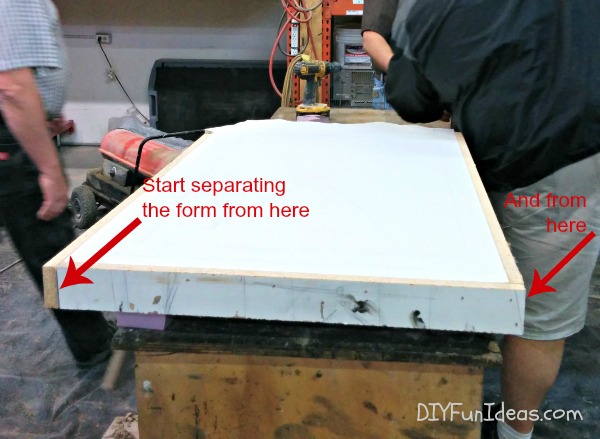
Notice the arrow pointing to where to start separating the sides of the form. You can use a screwdriver to start separating. Strip all the sides first and then lift the melamine off the top.
Be careful not to drag the melamine on the surface of the countertop. This can cause scratching.
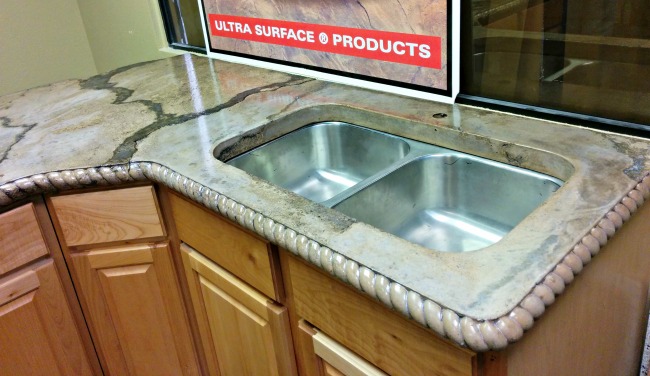
Next, remove the polystyrene sink cut out…
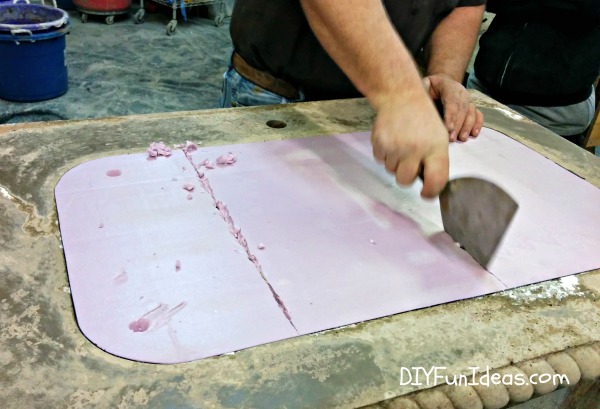
We used a putty knife to cut through it and lift the pieces out, but you can use any sharp object.
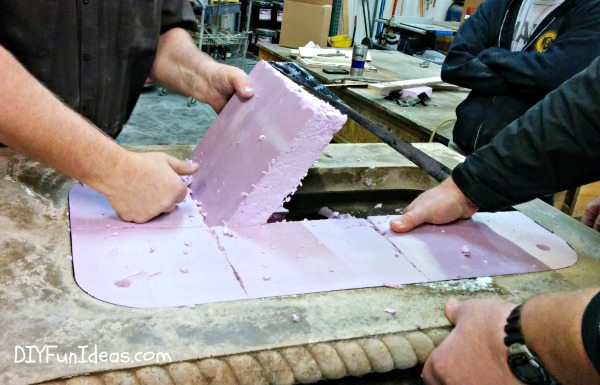
Here’s what the sink section looks like…
Then flip the second half of the countertop. Again, place your blocks down first…
Lay the slab on the blocks…
Remove the sides of the form and then lift the top off.
You can carefully remove any jagged edges with some medium grit sand paper.
Now, we wait again.
I know, right? Don’t you hate this part!
But you need to wait at least another 24 hours minimum for additional curing once the slab is removed from the form. Ugh.
But the cool part is that you can start to see what your countertop is going to look like. And the grouting and sealing process is going to really enhance your countertop by bringing out the color and that natural stone look.
Once your mandatory 24 wait period is over, you can start finishing your countertop.
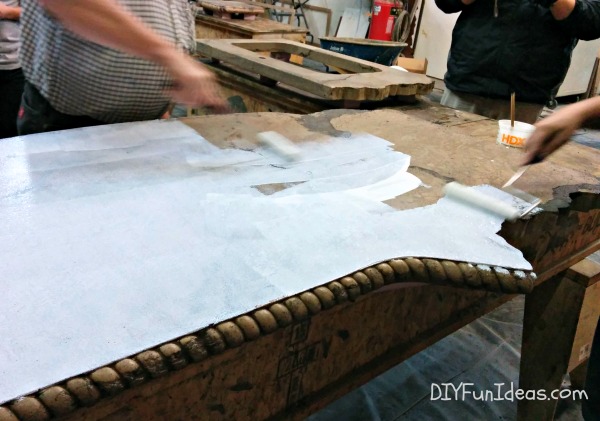
The first step in finishing is to apply a coat of Ashby Super Seal which is easily applied with a mini roller.
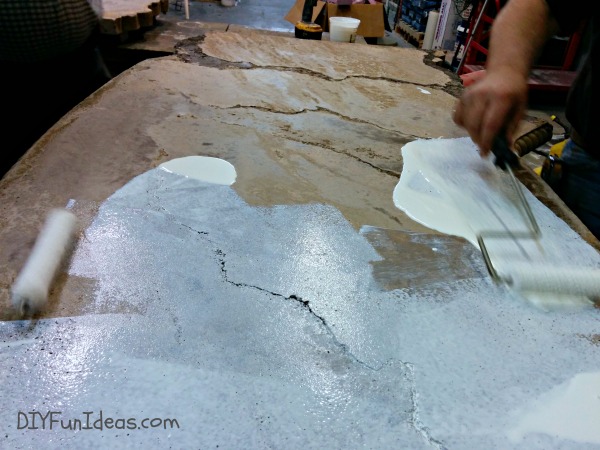
After applying the sealer, you can actually see all the tiny little pin holes left behind from air in the concrete mix.
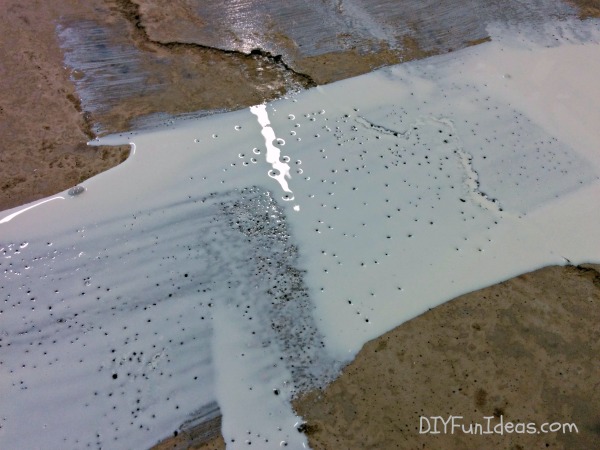
Grouting will fill in those pinholes. It’s important to fill the pinholes because if you don’t, they can cause trouble later on by allowing water to get below the sealers.
Wait at least four hours before grouting.
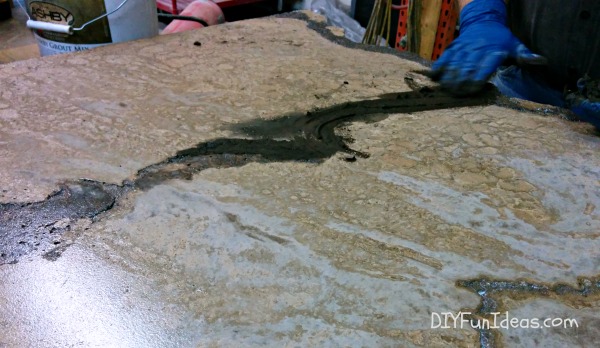
When it’s time to grout (we used Ashby Pinhole Grout Mix), follow the package mixing instructions and add whatever color you choose to the mix. We went with a near black grout color.
You can start the grouting process by smearing the grout onto the deepest veins and pockets.
Then use a damp sponge to rub the grout into all the tiny little pinholes.
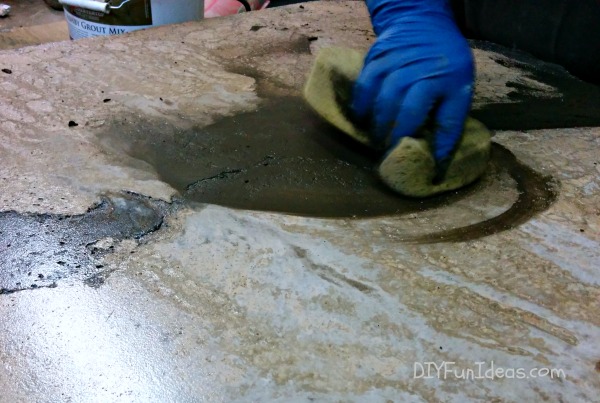
Work in small areas at a time.
It’s really hard to see if you’ve filled in all the holes. It will look like you have, but don’t trust that. We rubbed and rubbed and rubbed and when we applied the next coat of sealer we saw how many pinholes we missed. So when you think you’re done, put another five or ten minutes into it.
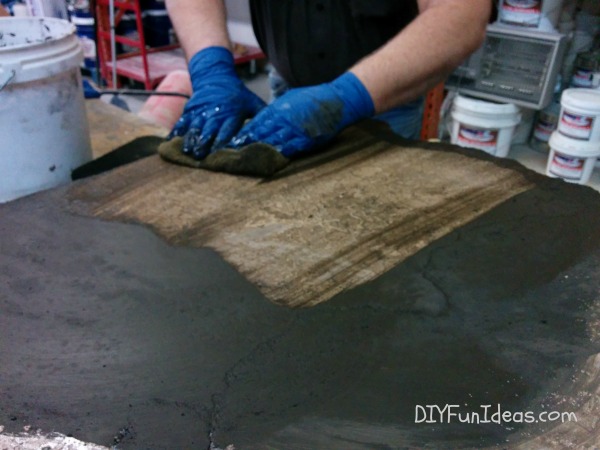
Once you’re done grouting an area, wipe away the excess grout with a clean damp sponge (squeeze out all the water). Wipe in long strokes applying heavy pressure. Only wipe once with each side of the sponge and then rinse and squeeze the sponge out before moving onto the next area.
Use less pressure when wiping over the veins so you leave as much grout in those areas as possible.
After wiping, let dry. Then use a cotton cloth to remove any haze and grout residue left behind.

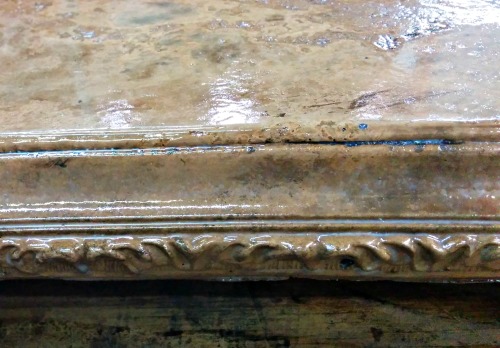
Repeat the same process on the sides of your slab. You can also use a small brush on the sides to get the grout into the decorative edges.
Wait a minimum of four hours for the grout to dry. Then apply a second coat of Super Seal.
Wait another four hours. Then apply CounterSeal 3, the final sealer. CounterSeal 3 is a urethane topcoat sealer that provides a stain resistant, scratch resistant, and heat resistant durable finish and is available in either a satin or gloss finish.
Follow the mixing instructions for CounterSeal 3 and then pour it through a nylon paint strainer to ensure a smooth flow.

CounterSeal 3 is applied with a spray gun at a pressure of approximately 40 psi.
And you’re going to need to wear one of these…
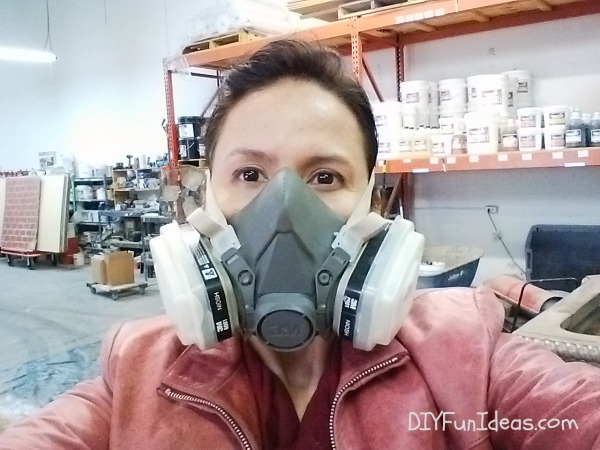
I know what you’re saying…Sexy, right?
Yes, wear a respirator!
This stuff stinks, so make sure you can leave the area afterward while it dries.
We didn’t have a mask small enough for my spoiled little monster angel. So she had to wait in the office until we were done. She was not very happy.

With your spray gun, apply CounterSeal 3 in long side to side strokes
If the sealer goes on with an orange peel texture, that means not enough sealer was applied. But you also don’t want it to go on too thick, allowing it to puddle too deep in low areas.
Here’s what our countertop looked like after spraying on CounterSeal 3…
You’re almost done now. Just let your countertop dry for a minimum of 48 hours before transporting or installing and you’ll be good to go!
Before we get to the final pictures, though, I thought I’d share some of the pieces that the individual students made in class.
In addition to participating in making the countertops while Ben was teaching, each student made their own individual sample piece. That way we all get to go through each step of the process on our own which really reinforces learning.
Our sample pieces were about 18″ by 18″ in size. The students that drove to the class took theirs home. I wish I could have taken my 25 lb. block on concrete onto the plane, but that might have been a little much.
So check ’em out. (These pictures were taken before the final sealer was dry so you will see some white spots on them.)
Most of us used multiple decorative edges on our pieces so we could get an idea of what each looked like when finished.
This one’s mine…
Perdy, huh.
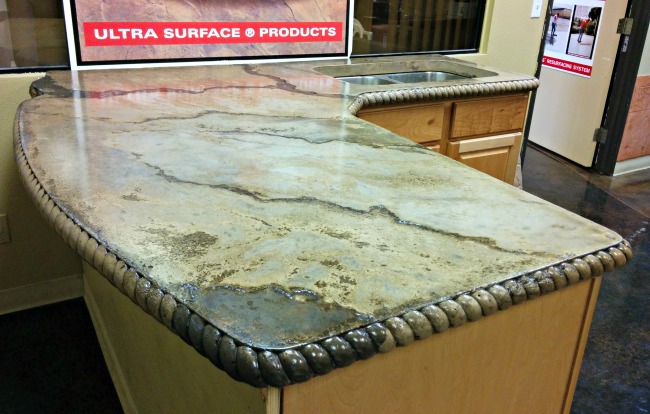
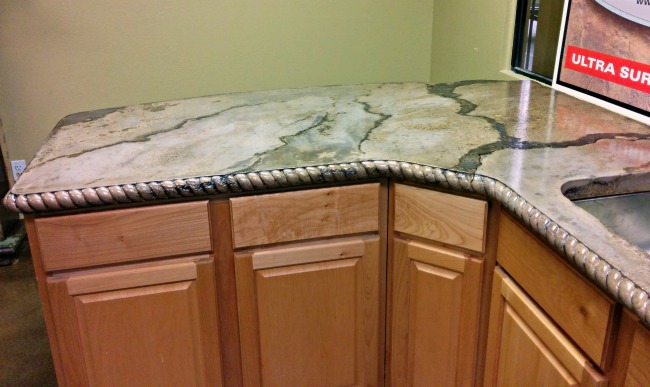
And here is our concrete countertop, installed and all!
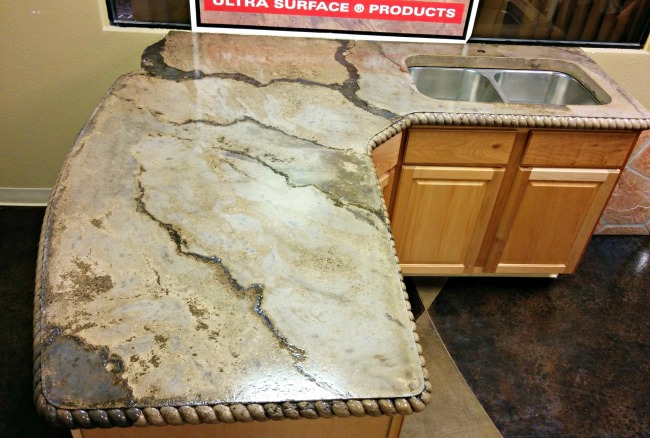
Now that is stunning, if I do say so myself!
You can see here where the two pieces of the countertop meet…
To seal that joint, you would grout it and then apply some furniture wax to the cured grout. And the joint will completely disappear.
So that’s it folks. How to make concrete countertops like the pros using the Ashby System.
If you made it this far through the tutorial, you know you want one of your own. So if you’re thinking of remodeling your kitchen and you have the time, I definitely recommend taking the class. Having countertops like these made for your kitchen would costs THOUSANDS of dollars. But you can make your own at a fraction of the cost. And what I really love about these counters is that not only are they simply stunning, but I’ve never ever met anyone that has anything remotely like this in their home.
So, my plan for 2015 is to make a set of these concrete counters for my parents’ home. I’ll be keeping their kitchen makeover on a budget. The plan includes taking down a wall to create an open concept. I’ll also be painting the current cabinets, but will have to reconfigure them since they’ll be losing a wall.
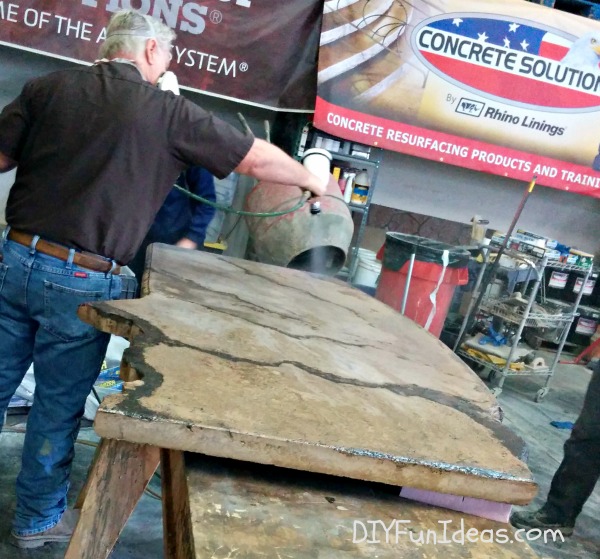
Also in 2015, with the help of Countertop Solutions, I will be laying a stamped concrete driveway at mom and pop’s place too. Countertop Solutions just launched this amazingly innovative product that uses rubber molds to create very large concrete tiles that are then tiled onto a driveway. Here’s a sneak peak of what that looks like…
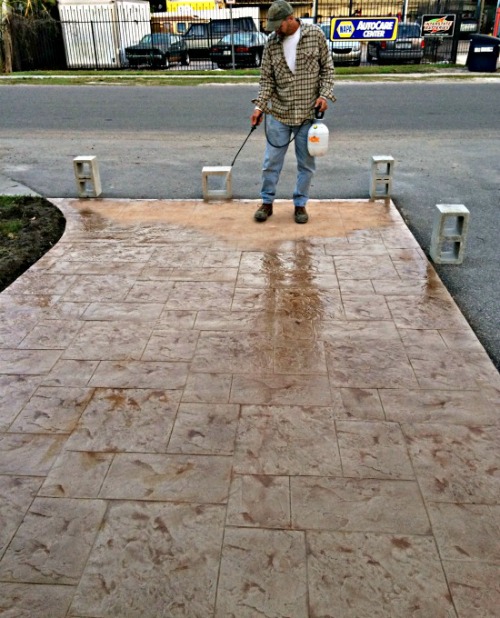
In the image above, the gentleman is applying a concrete stain. Your stamped concrete can be stained any color.
I plan on using a mold that looks like stone rather than brick. But more on that at a future date.
In the meantime, a great big thanks to Countertop Solutions for inviting me to sit in on their class so I could bring you this really cool concrete countertop tutorial.
That’s all folks!

This post linked to some of these totally fabulous blogs and Remodelaholic.
I just discovered this site and wanted to say hey to you Jenise.
I have already learned a lot on how to improve myself as blogger. Your posts are amazingly detailed with step-by-step pictures. Something I am definitely going to practice in my site too!
Great that you have such broad range of knowledge to actually build so many different things. I feel only confident when talking about playhouses, but I am trying to learn!
Your new fan.
Oh my Rebecca, you are so sweet! Thank you for the kind words! I guess I just try to approach my tutorials in a way where any novice would find it useful, because really I still consider myself a novice. I hate when I read a tutorial and then end up having to google half the processes because then it makes me feel like I’m in over my head. So I guess I want my readers to feel empowered and not threatened when they think of power tools or concrete or anything.
I stopped by housesforplaying.com. So cute and fun. I always wanted a playhouse when I was little. Back in Brooklyn we settled for the neighbor’s new refrigerator box. :-)
Wow, many steps, lots of work, but beautiful results. Thanks for linking up!
Thank you! And thanks for hosting!!
Really a lot of work, but gorgeous! Love the results!! Thanks for sharing with SYC.
hugs,
Jann
Gzzzz That was the EASY way? OK I’m sure it was easier than some other concrete counters…. But it looks very labor intense. Plus muscle powered. :-) I would love this but I’m afraid it is out of my range of DYI. I don’t have the extra muscle backup. Also it looks like the counters were created in a shop not in your kitchen. I would love to see something poured ON site. I love your posts, tutorials, and ideas. Keep them coming. I will be following. :-)
Hi Debra, We made these counters in a class to learn how to make them. There are multiple steps, but none of them are hard to do. They are all very simple and easy to do. Yes, I guess some muscle power is needed both for flipping the counters and then for installing — that’s when we call in favors. :-) I will actually be repeating this process later this year for my mom’s kitchen, so will be definitely pouring on site. Will also be doing a stamped concrete driveway on site at the end of the month and a bathroom vanity with integral sink in April. Can’t wait to share with ya!
These are absolutely gorgeous!! I do have one question, do you think it would be possible to get same/similar results in appearance if you poured the concrete on an existing countertop? I’m wondering if you pour it in sections and add color, etc if you would get the same result…Thanks!
Thank you Lauren. The answer to your question is no. Unfortunately, you would not get the same result. If you poured the concrete on top of existing countertops, the results would look like the back of the concrete slab that you see in the first few pictures. Pouring into the form makes a big difference so that the fibers don’t show through and in getting the marbled effect.
Thank you so much for sharing what you learned about concrete counter tops. I have read it twice today and YES I want to take the class!!! I look forward to reading about your mom and pops new countertops. Again, thank you! I too will have to bring my fluffy friend, Chloe.
That’s awesome Brenda that you’ll be bringing Chloe along! You will LOVE the class. It was such a great learning experience. I haven’t gotten to their countertops yet, but hoping to get there shortly. Although, I just did finish doing a skim coat of concrete over a laminate vanity top in one of their bathrooms and I’m so happy with how that turned out. I should have the tutorial on that one coming shortly. :-)
Hey great tutorial! I’ve been studying up to prep for making my own. I notice you use the Super Seal rather than Seal 1 and 2. Did you skip the 1 and 2? If so, why?
Thanks!
Hi Steph! Yes. Seal 1 & 2 are part of an older system. Super Seal was developed to replace the two to simplify the system and reduce the number of products needed and it’s recommended over the old system. I believe they still sell the old system right now. Not sure how long that will be, but Countertop Solutions recommends going with the new system over the old. Hope that helps. Please let me know if you have more questions. I’m glad to help!
What beautiful countertops! Your tutorial is very detailed except I can’t seem to find any information regarding the edging. Is it there and I just missed it?
I am so in love with these countertops and want to learn as much as I can before attempting them. I am extremely nervous in attempting this on my own but I am determined to have these in my kitchen. Going to Vegas for a class is probably the best way to achieve my goal but it isn’t possible right now. I was wondering if you knew of any resources in the Midwest where I could learn this technique? Thanks again for taking the time sharing these amazing countertops.
Hi Cathy!
Sorry for the delayed response. I really don’t know of any place in the mid-west. Sorry. As far as the edging goes, it’s a rubber mold that is just nailed (with a brad nailer) onto the inside edges of your melamine form. Countertop Solutions have them available for sale on their website, but you can also find some on Amazon here. I know a project like this can definitely be intimidating. So what I’d recommend is perhaps so a small sample before you start. Create a small melamine mold that’s perhaps 2′ x 2′. Practice the entire process, but don’t even worry about adding any of the additives at this point (so you don’t have any extra cost). Just mix up plain old concrete and water in a bucket and pour it into your mold. I think once you do something small like this, it’ll give you the confidence to go bigger.
Love this tutorial. Without it I would never attempt. I would like to do this but, instead of marbling,
I would like to make my concrete white and add crushed glass in white and blue as aggregate.
I know this will mean pressing aggregate in and smoothing over and ultimately sanding to reveal it. But I was wondering if you could think of anything else in tutorial that I might have to do differently?
Thanks!
Hi Miss Kitty! Actually, you won’t be pressing the aggregate into the concrete. If you try to do that, it will be very difficult to get a flat even surface. Remember, you are pouring your countertop upside down, meaning that the concrete that touches the melamine board will actually be the top surface of your counter. So there are two ways you can do it. Either 1) spread your aggregate onto the melamine form first and then pour your concrete over it, or 2) mix your aggregate with a small amount of concrete and pour that onto your form and spread it out so that it covers the entire form, then pour the remaining concrete over it. You will definitely need to sand and polish to reveal the aggregate. Wet sanding will make it easier.
You make it sound easier than my husband thought it wpup be. We are currently in our 2nd house flip and I want to attempt to do this for the house. I was wondering if you had a ball park on total cost for the counter top you did?
Hi Haley,
I’m going to directly email you a spreadsheet I put together some time ago with cost estimates. Hope it helps. And let me know if you have any other questions. Thanks!
Hi Jenise,
Just found your site and so excited to do our own counter tops. Would you mind sharing that spreadsheet with me as well. I know the costs will be out of date but it will give me a place to start.
Thanks!!
PS – Did you do your Mom’s? How is it holding up? Is there lots of maintenance?
Loved the how to video and I have to do this!! Can you please tell me how much it will cost for me to do 56sq.ft.? I am on a tight budget. Can I do black and white with a hint of a light blue and or gray?
Hi Angelina,
I’m going to send you a direct email with a spreadsheet that I put together that includes estimated costs along with a list of all tools needed.
Hi Jenise,
These counters are phenomenal! A trip to Vegas is not in the cards (<- see what I did there?) right now, but your tutorial is so thorough I think I can pull this off without the class.
If you wouldn't mind, I would also like to have the spreadsheet of estimated costs and tools needed emailed to me.
And I'll be watching for your counters at your parents. I hope it goes smoothly.
Hi Jane, So sorry for the delayed response. I’ve sent the spreadsheet. Please let me know if you have any other questions. Note that the volume of some of the materials are based on the size of my Mom’s countertops, so you’ll need to adjust for your own.
Hello. Enjoyed the tutorial on the marbled counter top!
Would you please send me (email) the spreadsheet with cost estimates?
Much appreciated!!
Hi Ken,
Sent. Please let me know if you have any questions. :-)
Interesting . Great tutorial, but somewhere I missed when u applied the form sides with the swirled rubber molds.
Hi Karen,
To apply the rubber edge molds, you nail them onto the sides with a brad nailer and then caulk any seams. Later, after you remove your forms, you simply pull the molds off of the melamine form. The nail holes in the rubber will close back up. Hope that helps and please let me know if you have more questions. :-)
Totally enjoyed this. Wish I came upon this when I did mine sure could have used your help. But I think it came out ok. Would like to send pics of my results.
Hi Denise! Sorry for the delayed response. Sometimes my comments don’t show up right away. Weird. But I’d LOVE to see pictures of your countertops ([email protected]) and hear more about the process you used!!! I actually just poured another countertop this weekend. It’s for a bathroom vanity top with an integral sink. It’s the first time I’ve done one with a built in sink so I can’t wait to remove the mold to see what it looks like. Of course, I’ll be sharing the results on the blog. :-)
Brilliant! Awesome tutorial, very informative!
Thank so much Debbie. I was a lot of fun and a great learning experience.
HI there!
Great tutorial! Thank you for this!
Question: the link for the sealer you provided no longer links to the product. What type of sealer was used right before grouting? I have some Stone Tone water based acrylic sealer leftover from doing my floors. Could I use this?
Is the point of putting sealer on at this point just to keep the grout from sticking to the rest of the counter? If so, wouldn’t the sealer penetrate the pinholes and keep it from adhering?
Thanks,
Kari
Hi Kari,
Here’s an updated link to the sealers. I believe we used Ashby Super Seal, which is an epoxy based primer, before grouting. After grouting with did a topcoat of Counter Seal 3. I am not familiar with Stone Tone, so I can’t really comment on it. Putting the sealer on before grout helps the grout not discolor the rest of the counter. The sealer will penetrate the pinholes to an extent, but the grout will help to completely fill in those pinholes.
don’t you have to polish the surface? I didn’t see that step.
No. This process does not require polishing. As a matter of fact, you’ll actually mess up the result if you polish it.